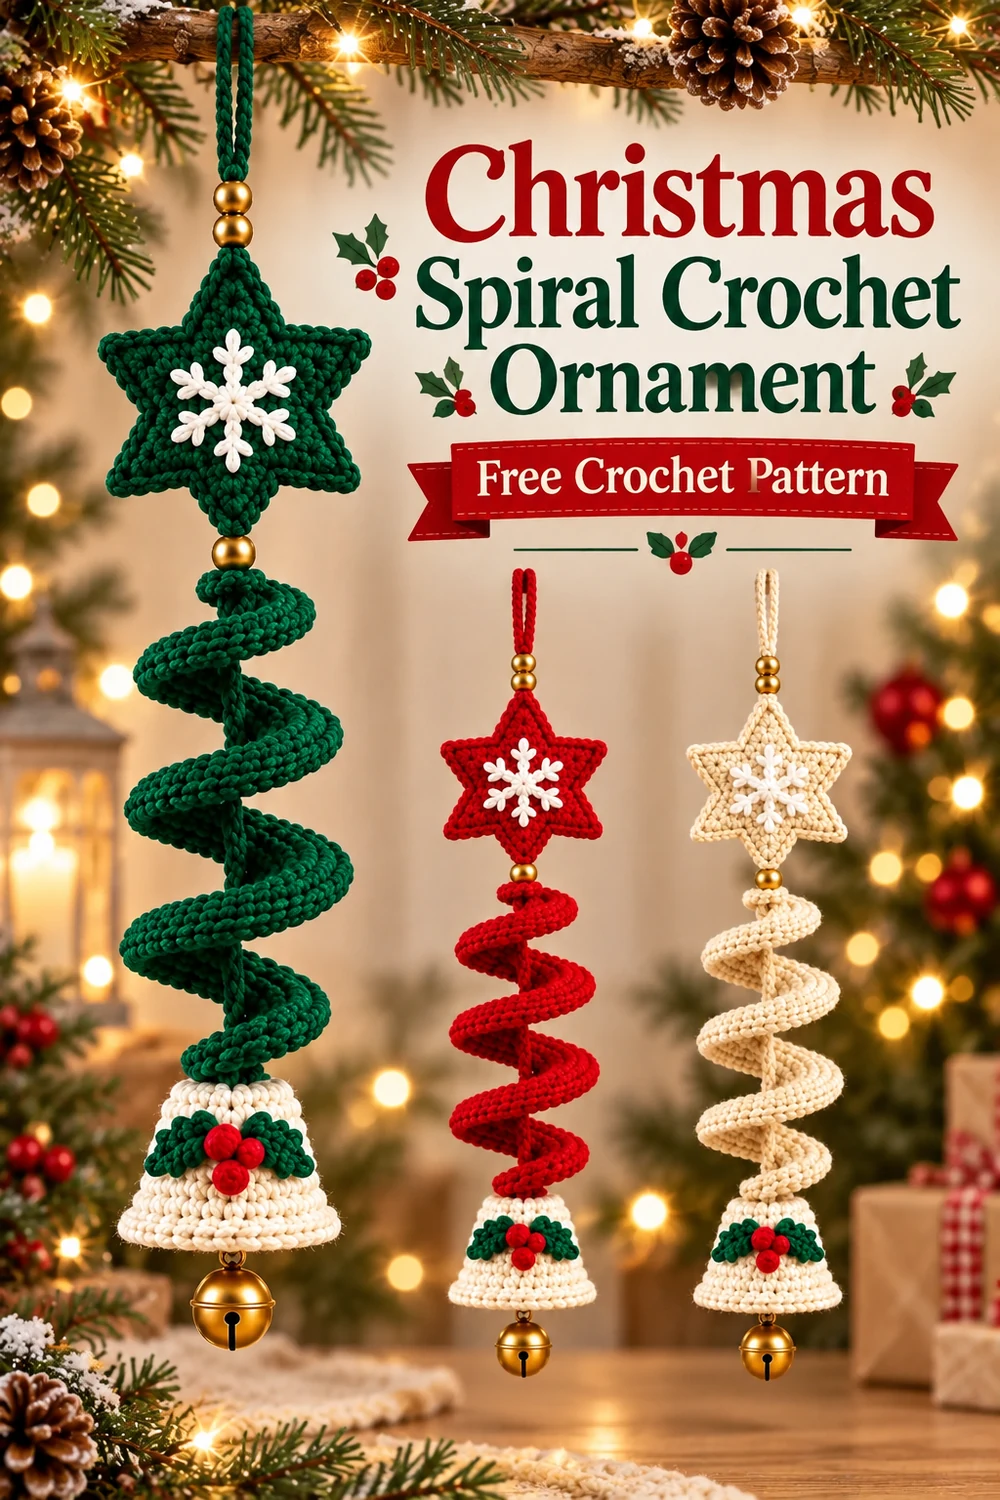
Christmas Spiral Crochet Ornament
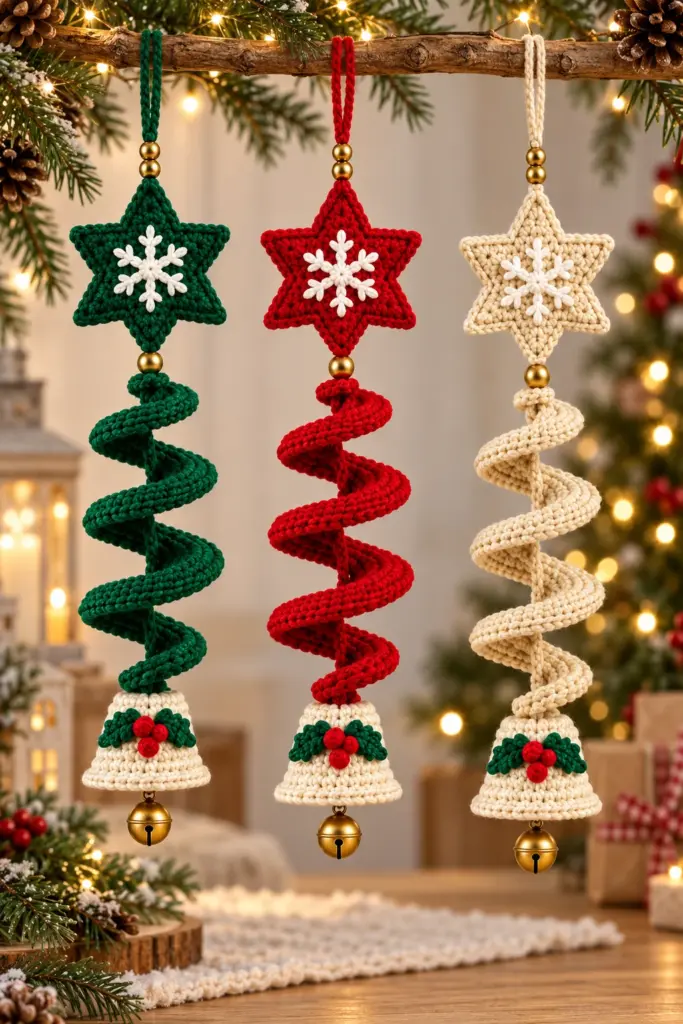
Bring handcrafted charm to your holiday décor with this Christmas Spiral Crochet Ornament. The design combines a double-layer five-point star, a delicate six-arm snowflake, a dramatic corkscrew ribbon, a cream bell-shaped cover, holly leaves, berries, gold beads, and a real jingle bell. Make it in emerald green, Christmas red, or natural cream for a coordinated set.
This original free pattern uses US crochet terminology and makes one ornament. The reference arrangement contains three colorways of the same design.
Pattern at a Glance
- Skill level: Intermediate
- Terminology: US crochet terms
- Construction: Separate crocheted components assembled on a doubled structural yarn cord
- Working method: Continuous rounds, turned rows, and foundation-chain rows
- Finished length: Approximately 19–21 in (48–53 cm)
- Stuffing: None
Components for One Ornament
- Hanging Loop: 1
- Star Panels: 2
- Star Perimeter Edging: worked on each panel
- Six-Arm Snowflake Appliqué: 1
- Corkscrew Spiral Ribbon: 1
- Bell Cover: 1
- Holly Leaves: 2
- Berry Discs: 3
- Structural Assembly Cord: 1
- Gold Round Beads: 3
- Jingle Bell: 1
Materials You’ll Need
- DK or light worsted cotton or cotton-blend yarn: approximately 55 yd (50 m) in the main color
- Approximately 18 yd (16 m) cream yarn
- Approximately 8 yd (7 m) white yarn
- Approximately 5 yd (4.5 m) green yarn
- Approximately 2 yd (2 m) red yarn
- 3.5 mm US E/4 crochet hook
- Yarn needle
- Removable stitch markers
- Scissors
- Optional blocking mat and rustproof pins
- Two approximately 10 mm gold round beads with holes large enough for doubled assembly yarn
- One approximately 12 mm gold round bead with a hole large enough for doubled assembly yarn
- One approximately 22–25 mm metal jingle bell with a secure top eye
Color arrangement: Use emerald green, Christmas red, or natural cream for the star, hanging loop, spiral, and structural cord. Make the bell cover cream, the snowflake white, the holly leaves green, and the berries red.
Safety: The beads and metal bell make this a decoration, not a toy. Keep the finished ornament away from small children and pets.
Gauge
20 sc and 22 rows = 4 in (10 cm) in firm single crochet.
Exact gauge is not critical, but a firm fabric helps the star and bell cover retain their shapes. If your stitches are loose enough to expose the assembly cord, use a smaller hook.
Finished Measurements
- Complete ornament: Approximately 19–21 in (48–53 cm) from the top of the folded loop to the bottom of the jingle bell
- Star: Approximately 4.5 in (11.5 cm) point to point
- Relaxed spiral: Approximately 10–11 in (25–28 cm) long and 2.5–3 in (6.5–7.5 cm) wide
- Bell cover: Approximately 2.75 in (7 cm) wide and 2.25 in (5.5 cm) high
- Folded hanging loop: Approximately 4 in (10 cm)
Measurements may vary with yarn, tension, bead size, and the arrangement of the corkscrew coils.
Crochet Abbreviations
- beg = beginning
- ch = chain
- dc = double crochet
- hdc = half double crochet
- MR = magic ring
- rep = repeat
- rnd = round
- RS = right side
- sc = single crochet
- sc2tog = single crochet 2 stitches together
- sl st = slip stitch
- sp = space
- st(s) = stitch(es)
- yo = yarn over
- WS = wrong side
Special Stitch
sc2tog: Insert the hook in the next st and pull up a loop, insert the hook in the following st and pull up a loop, yo, and pull through all 3 loops on the hook.
Reverse sc: Working from left to right, insert the hook in the next st to the right, pull up a loop, yo, and pull through both loops. Continue in this direction around the edge.
Important Pattern Notes
- Work continuous rounds unless the instructions specifically tell you to join. Mark the first stitch and move the marker after every round.
- A chain at the beginning of a row does not count as a stitch.
- Numbers in parentheses give the stitch count at the end of the row or round.
- Make all listed components before beginning final assembly.
- Leave every specified tail at full length because several tails form structural attachments.
- The star is double-layered but unstuffed. The bell cover is hollow and unstuffed.
- Block the two star panels to identical dimensions before joining them.
- The structural cord travels through the open central axis of the spiral, not through its outside coils.
- Check all knots, woven ends, beads, and hardware before displaying the ornament.
Complete Free Crochet Pattern
Component A: Star Panels — Make 2 in Main Color
Rnd 1: Into an MR, work 5 sc; do not join. (5)
Rnd 2: Work 2 sc in every st. (10)
Rnd 3: [Sc in next st, 2 sc in next st] 5 times. (15)
Rnd 4: [Sc in next 2 sts, 2 sc in next st] 5 times. (20) Join with sl st to first sc and fasten off.
Five Star Points
Divide the 20 stitches of Rnd 4 into five consecutive groups of four. Each group supports one point. With RS facing, join the yarn in the first stitch of a group.
Point Row 1: Ch 1, sc in the same st and in the next 3 sts; turn. (4)
Point Row 2: Ch 1, sc in first st, sc2tog, sc in last st; turn. (3)
Point Row 3: Ch 1, sc in first st, sc2tog; turn. (2)
Point Row 4: Ch 1, sc2tog. (1) Fasten off.
Repeat Point Rows 1–4 across each of the remaining four groups. Five points are completed, and all 20 stitches from Rnd 4 have been used exactly once.
Star Perimeter Edging — Work on Each Panel
With RS facing, join the main color in any valley between points. Work 7 sc evenly up the first side of the point, ch 1 at the tip, and 7 sc evenly down the second side; sl st in the valley. Repeat this sequence around all five points. (70 sc, 5 ch-1 tip spaces) Join and fasten off.
Weave in all point and edging ends. Block both panels to matching dimensions.
Component B: Six-Arm Snowflake Appliqué — Make 1 in White
Center Rnd: Into an MR, work 6 sc; join with sl st to first sc. (6)
First arm: *Ch 5. Sl st in second ch from hook and in next ch. Ch 3 and sl st in the first of these 3 chains to form an upper side picot. Sl st in the next 2 chains of the original ch-5 arm. Ch 3 and sl st in the first of these 3 chains to form a lower side picot. Sl st in the final chain of the original arm, then sl st in the next center sc.*
Repeat from * to * five more times, beginning one arm from each center sc. Each arm uses 11 chains and 8 sl sts; six arms are completed. Fasten off with a 20 in (50 cm) sewing tail. Shape the picots outward.
Component C: Corkscrew Spiral Ribbon — Make 1 in Main Color
Leave an 18 in (45 cm) beginning tail. Ch 61.
Row 1: Beginning in second ch from hook, work 3 sc in each of the next 10 chains, 3 hdc in each of the next 10 chains, and 3 dc in each of the final 40 chains. (30 sc, 30 hdc, 120 dc; 180 sts total)
Fasten off with an 18 in (45 cm) tail.
The crowded stitches make the strip curl naturally. Place the short sc section at the top, turn every coil in the same direction, and gently arrange the fabric into a descending corkscrew. Steam lightly or damp-block without flattening the curl.
Component D: Bell Cover — Make 1 in Cream
Leave a 12 in (30 cm) beginning tail at the crown.
Rnd 1: Into an MR, work 6 sc. (6)
Rnd 2: Sc in every st. (6)
Rnd 3: Work 2 sc in every st. (12)
Rnd 4: Sc in every st. (12)
Rnd 5: [Sc in next st, 2 sc in next st] 6 times. (18)
Rnd 6: Sc in every st. (18)
Rnd 7: [Sc in next 2 sts, 2 sc in next st] 6 times. (24)
Rnd 8: Sc in every st. (24)
Rnd 9: [Sc in next 3 sts, 2 sc in next st] 6 times. (30)
Rnd 10: Sc in every st. (30)
Rnd 11: [Sc in next 4 sts, 2 sc in next st] 6 times. (36)
Rnd 12: Sc in every st. (36)
Rnd 13: Working from left to right, reverse sc in every st. (36) Join and fasten off.
Weave in the final tail, retaining the crown tail. Leave the cover hollow and unstuffed.
Component E: Holly Leaves — Make 2 in Green
Leave a 10 in (25 cm) beginning tail. Ch 7.
Beginning in second ch from hook, work sl st, sc, hdc, dc, hdc, then 3 sc in the final chain. Rotate to work along the unused loops on the opposite side of the foundation chain; work hdc, dc, hdc, sc, sl st. (13 sts)
Fasten off with a 10 in (25 cm) sewing tail. Pinch the first and last stitches together to emphasize the pointed base.
Component F: Berry Discs — Make 3 in Red
For each berry, leave a 10 in (25 cm) beginning tail. Into an MR, work 6 sc; join with sl st to the first sc. (6) Pull the ring tightly and fasten off with a 10 in (25 cm) sewing tail. Do not add stuffing.
Component G: Hanging Loop — Make 1 in Main Color
Leave a 16 in (40 cm) beginning tail. Ch 45. Beginning in second ch from hook, sl st in each chain. (44 sl sts) Fasten off with a 16 in (40 cm) tail. Do not weave in either tail.
Component H: Structural Assembly Cord — Make 1
Cut a 48 in (122 cm) length of main-color yarn. Thread it through a yarn needle and double it so the two ends are even. Do not knot it yet. This doubled cord passes through the star, lower bead, spiral, bell cover, and jingle bell.
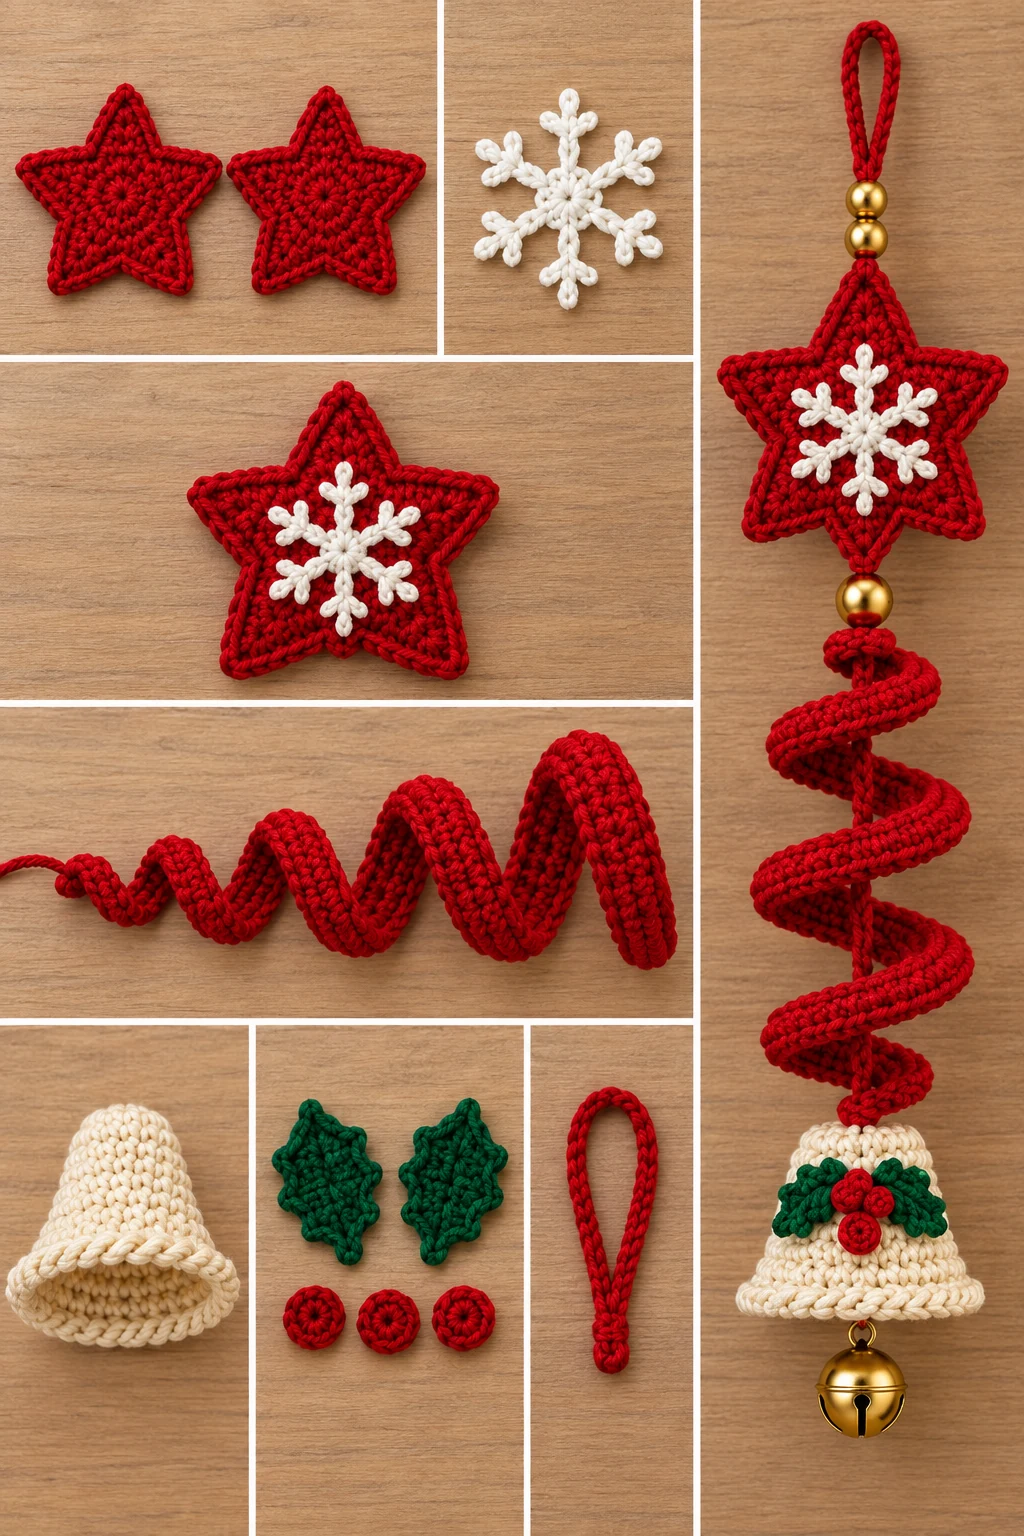
Assembly
- Attach the snowflake. Sew the snowflake to the RS center of one star panel with its retained tail. Tack the center ring, each arm tip, and both picots on every arm. Keep all white sewing stitches on the front panel only. Knot securely on the WS and weave in the remainder.
- Join the star panels. Place the two star panels WS together with their points and valleys aligned. Using main-color yarn and small whipstitches, sew through corresponding edging stitches around the complete perimeter. Do not stuff. Hide and secure the seam ends inside before closing the final inch.
- Add the hanging loop and two upper beads. Fold the hanging loop in half. Pass both loop tails through the two smaller gold beads, through the top ch-1 tip space of the star, and into the interior seam area. Adjust the visible folded loop to about 4 in (10 cm). Separate the tails, pass them in opposite directions through several internal stitches, tie a square knot, and weave each tail through at least 2 in (5 cm) of dense fabric. The beads must rest directly above the star.
- Attach the structural cord and lower bead. Insert the folded midpoint of the doubled structural cord through the bottom ch-1 tip space of the star from front to back. Pass the four loose cord strands through the fold to form a lark’s-head attachment. Pull firmly. Pass the cord ends together through the larger lower bead.
- Secure the top of the spiral. Position the sc end of the spiral immediately below the lower bead. Use the spiral’s 18 in (45 cm) beginning tail to sew the first three spiral stitches securely around the doubled structural cord. Make at least six passes, tie off against the WS of the spiral, and weave in the remainder. Keep the structural cord in the open central axis of the corkscrew rather than passing it through the outer coils.
- Secure the bottom of the spiral. At the spiral’s lower dc end, use its retained tail to wrap and stitch the last three stitches around the structural cord with at least six passes. Leave approximately 0.5 in (1.3 cm) between the last full coil and the crown of the bell cover. Knot and weave in the tail.
- Attach the bell cover. Pass the structural cord through the MR opening at the crown of the bell cover and down through its hollow center. Use the cream crown tail to stitch the crown around the cord at least six times. Knot securely inside the cover and weave in the remaining cream tail.
- Add the holly leaves. Arrange the two leaves in a shallow V on the front of the bell cover across Rnds 8–10. Sew around the leaf edges and add one line of small stitches along each center chain. Knot all green tails inside the cover and weave them through at least 1 in (2.5 cm) of fabric.
- Add the berry discs. Overlap the three berries in a triangular cluster where the leaf bases meet. Sew every berry around its complete edge with its two tails. Pull lightly so each disc cups outward. Knot the tails in pairs inside the bell cover and weave them securely.
- Attach the jingle bell. Thread the doubled structural cord through the bell’s top eye. Position the bell directly below the center of the cover with enough clearance to swing. Pass the cord through the eye three times if the opening permits, then tie the cord around itself with two square knots backed by a surgeon’s knot. Do not apply glue. Thread each end upward inside the bell cover, weave it separately through at least 2 in (5 cm) of dense crochet, and trim.
- Align the ornament. Hold the ornament by its loop and rotate the spiral coils until they descend evenly. Confirm that the star faces forward, the holly cluster aligns with the star front, no cord is visible outside the spiral axis, every bead is trapped between secure crochet attachments, and the jingle bell cannot slide off.
Finishing
Shape each star point and snowflake arm with your fingers. If needed, lightly damp-block the star while protecting the metal hardware from moisture. Arrange the spiral so all coils turn in the same direction and hang without tangling. Trim yarn ends only after every knot, attachment, and woven tail has been checked.
Customization Ideas
- Make the main-color sections in emerald green, Christmas red, or natural cream while retaining the prescribed cream bell cover, white snowflake, green leaves, and red berries.
- Create a coordinated set of three by making the same pattern once in each suggested main color.
- Use matte, metallic, or wooden gold-colored beads, provided all three have holes large enough for the required yarn strands.
- Choose cotton for crisp definition or a cotton blend for a slightly softer drape. Keep the yarn within the DK or light worsted range so the listed proportions remain balanced.
- For a shorter display, arrange the existing spiral coils more tightly. Do not omit stitches or components.
Common Mistakes to Avoid
- Misdividing the star: Each of the five points must use exactly four of the 20 stitches from Rnd 4.
- Counting turning chains as stitches: The beginning ch 1 on the point rows does not count.
- Uneven star edging: Work exactly 7 sc up and 7 sc down each point, with one ch-1 space at every tip.
- Missing a snowflake arm: Make one arm from each of the six center stitches.
- Working into too few spiral chains: After skipping the first chain, use 10 chains for sc groups, 10 for hdc groups, and the final 40 for dc groups.
- Flattening the spiral: Block gently and preserve the corkscrew shape.
- Running the cord through outside coils: Keep it in the open central axis so it remains hidden.
- Stuffing the pieces: Both the joined star and bell cover remain unstuffed.
- Weak hardware attachments: Use the stated passes, knots, and weaving lengths. Glue is not a substitute for secure stitching.
- Trimming tails too early: Retain all specified tails until their assembly tasks are complete.
Troubleshooting
Why does my star have uneven points?
Confirm that Rnd 4 has 20 stitches and that each point begins across a separate group of four. Check every point row before moving on: 4, 3, 2, and 1 stitch.
Why is one star panel larger than the other?
Compare stitch counts, yarn tension, and edging placement. Both panels should have 70 edging sc and five ch-1 tip spaces. Block them to matching dimensions before seaming.
Why is the spiral not curling?
Each foundation chain must receive three stitches. Row 1 contains 180 stitches in total. Gently twist every coil in the same direction after crocheting, and avoid flattening it during blocking.
Why does the spiral twist around the structural cord?
The cord may have passed through an outer coil or been attached off-center. It should descend through the open middle axis and connect only to the first three and last three spiral stitches.
Why does the bell cover lean?
Check that the cord passes through the center of the crown MR and that the crown is stitched evenly around it. Also confirm that the jingle bell hangs from the center beneath the cover.
Why do the beads slide?
The two smaller beads should be trapped between the folded loop and the top of the star. The larger bead should sit between the star’s lark’s-head cord attachment and the secured top of the spiral. Rework any attachment that leaves enough slack for a bead to escape.
Why does the jingle bell not swing?
Leave enough clearance below the bell cover for movement. The securing knots should hold the bell without pulling its eye tightly against the crochet.
Care Instructions
Dust the ornament gently or spot-clean the crochet with cool water and a small amount of mild detergent. Avoid soaking because the ornament includes metal hardware that may tarnish or rust. Blot with a towel, reshape the star and spiral, and dry flat with the metal bell positioned away from wet fabric. Store flat or loosely coiled in a dry box; do not crush the star points, snowflake arms, or spiral.
Frequently Asked Questions
Is this pattern written in US terms?
Yes. All stitch names and abbreviations use US crochet terminology.
How many ornaments does the pattern make?
The listed quantities make one complete ornament. Make the full pattern three times for the green, red, and natural colorways.
Do I need to stuff the star or bell cover?
No. The two star panels are joined without stuffing, and the bell cover remains hollow.
Can a beginner make this ornament?
A confident beginner may enjoy it, but the shaped points, reverse single crochet, detailed snowflake, precise assembly, and secure hardware attachments make it best suited to an intermediate crocheter.
Can I use acrylic yarn?
You can use DK or light worsted acrylic, but it may behave differently during blocking and may produce a softer shape. Firm cotton or a cotton blend gives the clearest stitch definition.
Can I omit the beads or jingle bell?
The beads and jingle bell are part of this design’s planned construction and proportions. Omitting them would require an independently tested assembly method, so follow the pattern as written for the intended result.
How are the stitch counts checked?
The star center progresses through 5, 10, 15, and 20 stitches. Five points consume four base stitches each. Each star edging has 70 sc and five tip spaces. The spiral uses 60 workable chains and contains 30 sc, 30 hdc, and 120 dc for 180 stitches. The bell cover progresses through 6, 6, 12, 12, 18, 18, 24, 24, 30, 30, 36, 36, and 36 stitches. Each holly leaf has 13 stitches, each berry has 6 sc, and the hanging loop has 44 return slip stitches.
How do I know the ornament is safe to hang?
Before displaying it, pull-test the loop, structural cord, spiral attachments, bell-cover crown, and jingle bell. Confirm that all beads are trapped, all knots are secure, and every structural end has been woven through the specified length of dense fabric. This remains a decoration and should be kept away from children and pets.