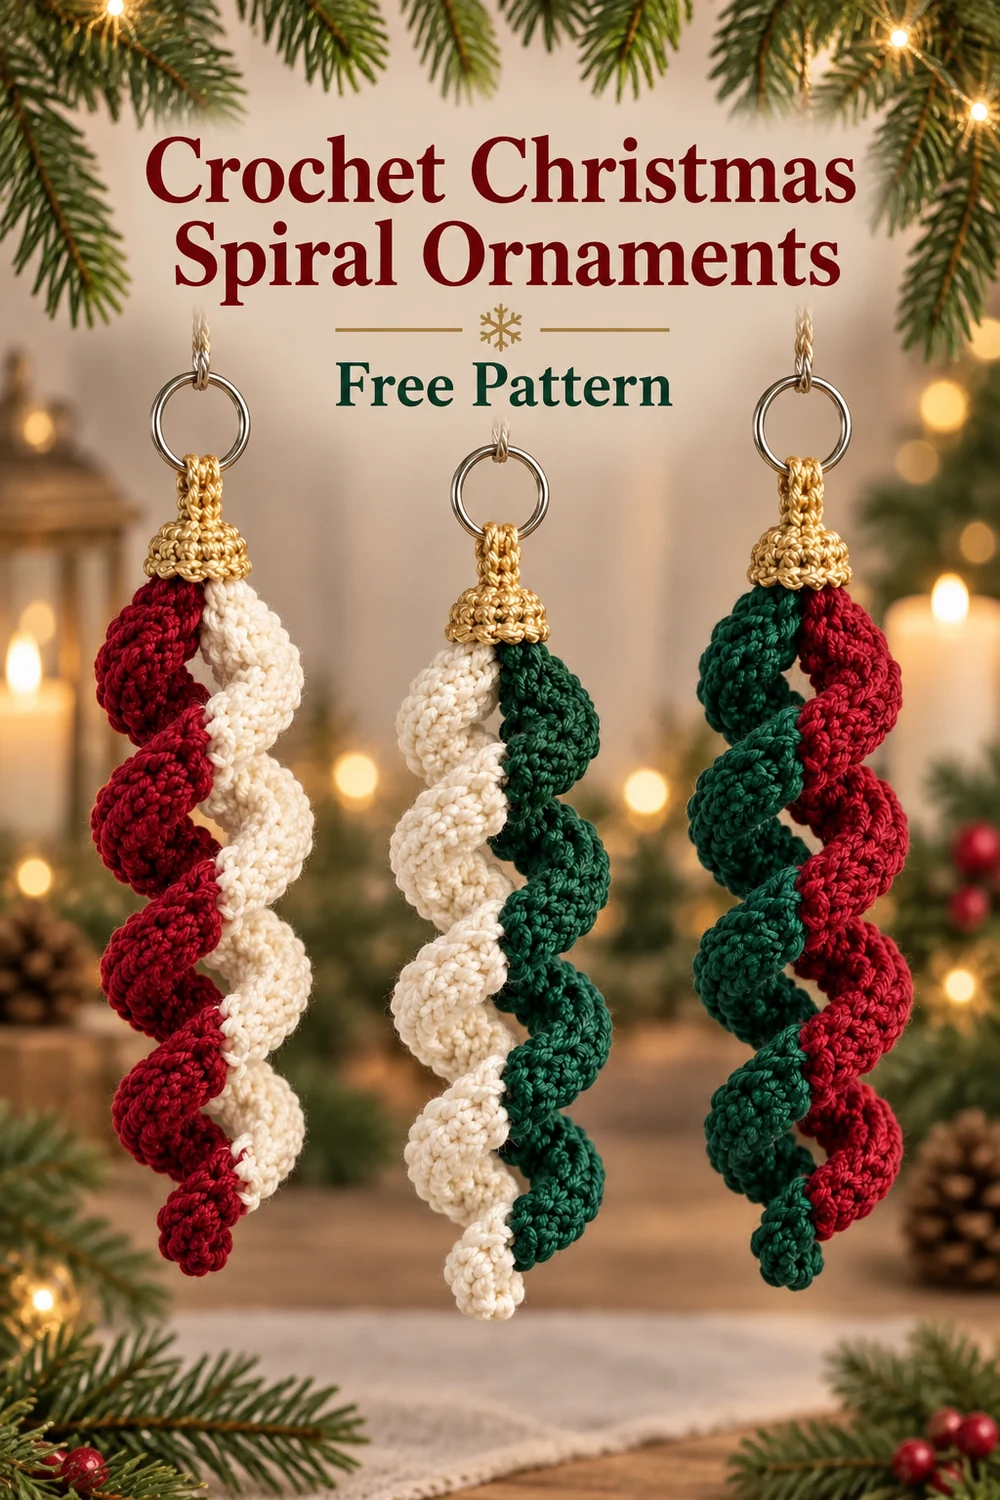
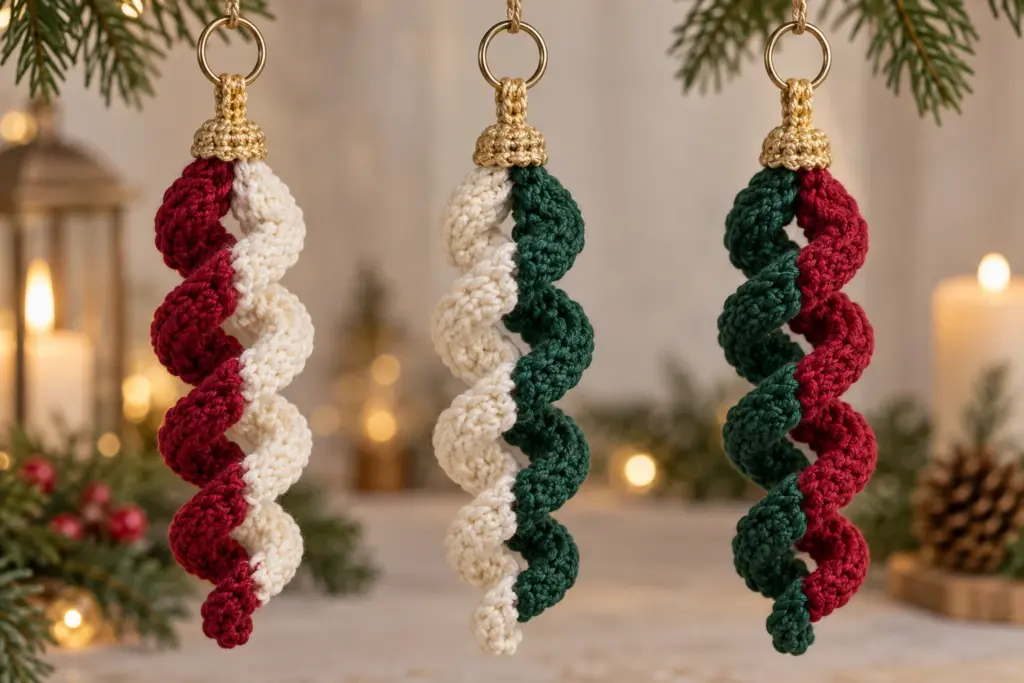
Crochet Christmas Spiral Ornaments
Add handmade color and movement to your tree with this free crochet pattern for three double-spiral Christmas ornaments. Each ornament combines two contrasting corkscrew arms, a gold cap cup, a reinforced gold hanging loop, and a 20 mm metal split ring. The pieces are quick to crochet, require no stuffing, and use approximately 90 yd (82 m) of DK-weight yarn for the complete set.
Pattern at a Glance
- Terminology: US crochet terms
- Skill level: Easy
- Construction: Crochet all components separately, then assemble one ornament at a time.
- Finished set: 3 ornaments
- Visible components: 6 Spiral Arms, 3 Cap Cups, 3 Hanging Loops, and 3 metal split rings
- Crocheted components per ornament: 2 Spiral Arms, 1 Cap Cup, and 1 Hanging Loop
- Total crocheted components: 12
- Stuffing: None
Color Plan and Quantities
- Ornament 1: 1 cranberry Spiral Arm, 1 cream Spiral Arm, 1 gold Cap Cup, and 1 gold Hanging Loop
- Ornament 2: 1 cream Spiral Arm, 1 evergreen Spiral Arm, 1 gold Cap Cup, and 1 gold Hanging Loop
- Ornament 3: 1 evergreen Spiral Arm, 1 cranberry Spiral Arm, 1 gold Cap Cup, and 1 gold Hanging Loop
Materials You’ll Need
- DK-weight yarn, category 3: approximately 90 yd (82 m) total
- Color A, cranberry: approximately 20 yd (18 m)
- Color B, cream: approximately 20 yd (18 m)
- Color C, evergreen: approximately 20 yd (18 m)
- Color D, gold: approximately 30 yd (28 m), for all Cap Cups and Hanging Loops
- US E/4 (3.5 mm) crochet hook
- Yarn needle
- Scissors
- Removable stitch marker
- Ruler
- Three 20 mm metal split rings
No stuffing is required.
Gauge
22 sc and 24 rows = 4 in (10 cm) in unblocked single crochet. Exact gauge is not critical, but consistent tension helps all three ornaments match.
Finished Measurements
Each completed ornament measures approximately 6.5 in (16.5 cm) from the top of the crocheted loop to the bottom of the spirals, excluding the metal split ring. Each curled body is approximately 1.5–2 in (4–5 cm) wide. The folded Hanging Loop has an approximate drop of 1.75 in (4.5 cm).
Finished dimensions and curl diameter can vary with yarn, hook, and tension.
Crochet Abbreviations
- US: United States crochet terminology
- ch: chain
- sc: single crochet
- hdc: half double crochet
- sl st: slip stitch
- st(s): stitch(es)
- MR: magic ring
- inc: work 2 sc in the indicated stitch
- R: round or row, as identified
- FO: fasten off
Important Pattern Notes
- Chains do not count as stitches unless expressly stated.
- Work each Cap Cup in joined rounds.
- Join each cap round with a sl st to the first sc. The joining sl st does not count as a stitch.
- Place a marker in the first stitch of each cap round if helpful.
- Crochet every component before beginning assembly.
- Leave all specified sewing tails because they form structural joins.
- Do not block the Spiral Arms flat.
- Confirm that every Spiral Arm has 25 visible groups of 4 hdc before fastening off.
- These ornaments are decorations, not toys. Keep loose cords and small hardware away from young children and pets.
Complete Free Crochet Pattern
Component 1 — Spiral Arm (Make 6)
Use the colors assigned in the Color Plan: make 2 in cranberry, 2 in cream, and 2 in evergreen.
Foundation: Ch 26.
Row 1: Work 4 hdc in the second ch from the hook. Work 4 hdc in each remaining ch across. (25 groups; 100 hdc)
FO, leaving a 10 in (25 cm) sewing tail at the beginning end. The tail at the opposite end may be woven in immediately.
Finish the arm: Hold the beginning tail at the top. Gently run two fingers down the arm and encourage every curl to turn in the same natural direction. Do not block it flat.
Stitch check: The 26-chain foundation has 25 working positions after the first chain is skipped. Four hdc in each of those 25 positions gives 25 × 4 = 100 hdc.
Component 2 — Cap Cup (Make 3)
Use Color D, gold, and work with firm, even tension.
R1: Make an MR, ch 1, and work 6 sc in the ring. Join with a sl st to the first sc. Pull the ring firmly closed. (6 sc)
R2: Ch 1, inc in each st around; join. (12 sc)
R3: Ch 1, [sc in next st, inc in next st] 6 times; join. (18 sc)
R4: Ch 1, sc in each st around through the back loop only; join. (18 sc)
FO, leaving a 16 in (40 cm) sewing tail. The unworked front loops of R4 create a subtle decorative rim.
Thread the MR tail through all 6 stitches of R1 once more, pull snug, knot discreetly on the inside, and weave it in.
Stitch check: R1 has 6 sc. Increasing in every stitch doubles R2 to 12 sc. Six repeats containing 1 sc and 1 increase produce 18 sc in R3. Working 1 sc in each stitch preserves the 18-stitch count in R4.
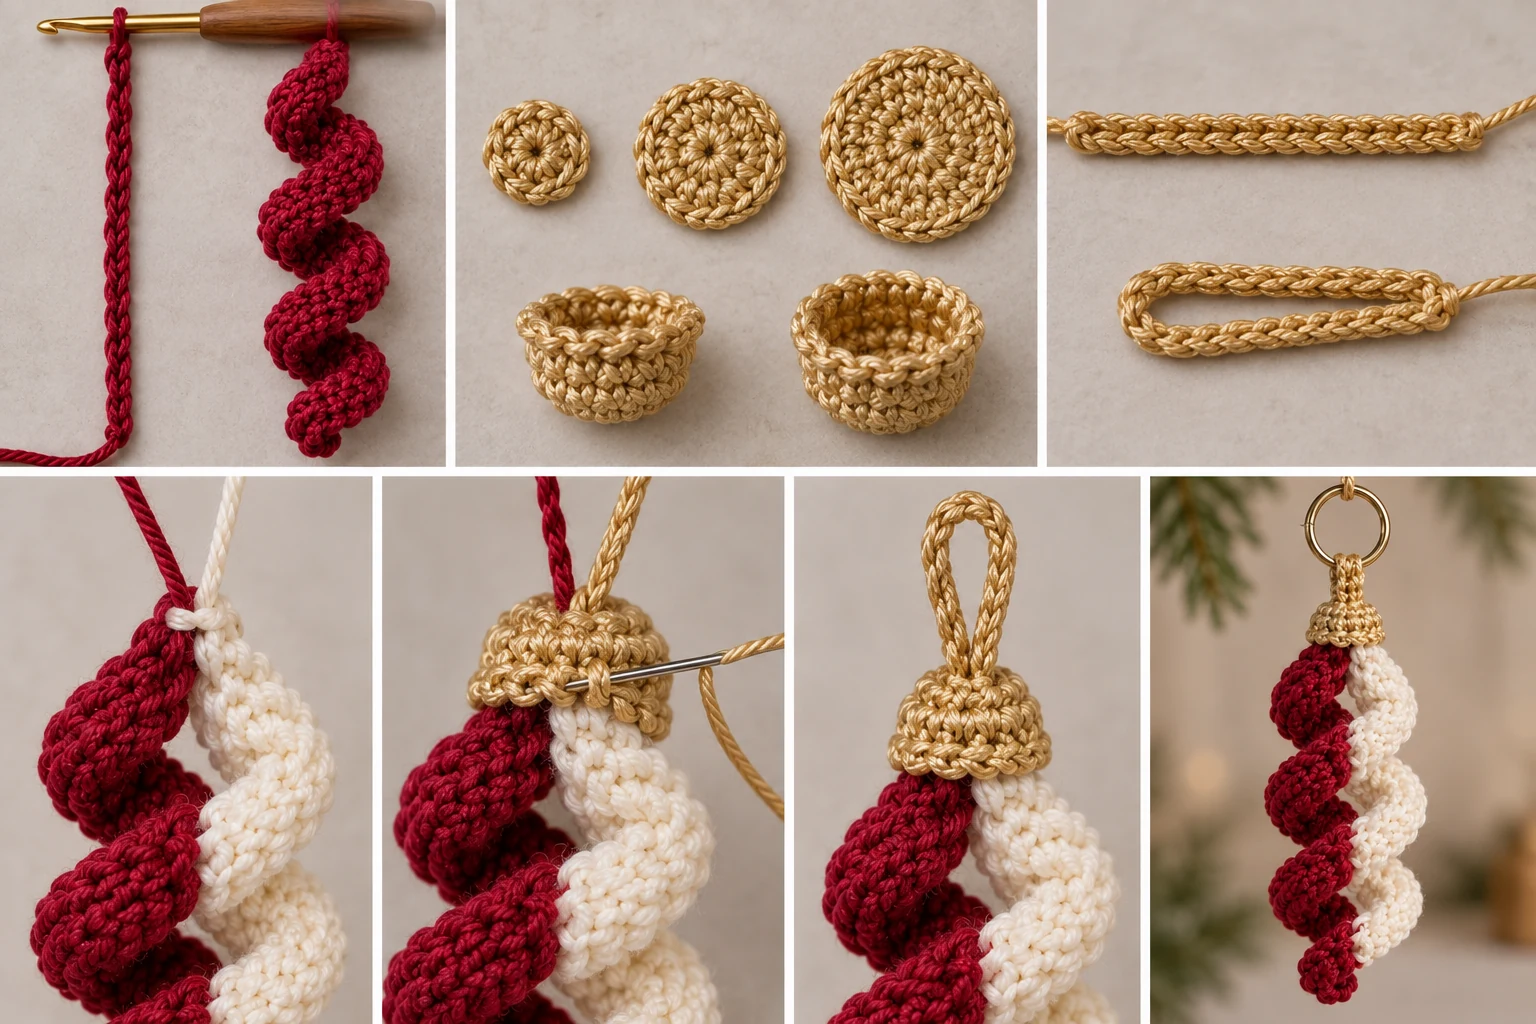
Component 3 — Hanging Loop (Make 3)
Use Color D, gold.
Leave a 6 in (15 cm) beginning tail and ch 24. Starting in the second ch from the hook, sl st in each of the next 23 chains. Work 1 sl st in the first foundation chain at the base of the cord. (24 foundation chains; 24 reinforcing sl sts)
FO, leaving a 6 in (15 cm) ending tail. Bring the two cord ends together without twisting them. The folded loop should have an approximate drop of 1.75 in (4.5 cm).
Assembly
Complete one ornament at a time, following the Color Plan.
- Join the Spiral Arms: Pair the two assigned Spiral Arms. Align their beginning ends and let the curls hang side by side. Thread one 10 in (25 cm) arm tail onto the yarn needle. Pass it through the top edge of the second arm twice, then through the top edge of the first arm. Tie the two arm tails together with a firm square knot. Do not cut the tails.
- Position the Cap Cup: Insert the joined tops of both arms into the open bottom of one Cap Cup. Place the join against the inside of R1, with both spirals emerging through the 18-stitch opening.
- Anchor the arm bundle: Use the two arm tails separately. Pass each tail through a different R1 stitch on opposite sides of the MR, passing through its anchoring stitch twice. Tie the tails together securely inside the cup. Trim them to 1 in (2.5 cm) and tuck the ends inside.
- Close the cap around the arms: Thread the Cap Cup’s 16 in (40 cm) tail. Sew around the R4 opening with small whipstitches, catching all 18 front loops of R4 in sequence and passing through the upper edges of the Spiral Arms. Pull only until the opening fits closely around the bundle; do not crush the curls. Make two small backstitches inside the cap, knot securely, weave the tail through at least 1 in (2.5 cm) of cap stitches, and trim.
- Insert the Hanging Loop: Pass one cord end from outside the cap through one side of R1. Pass the other end through the opposite side of R1. The loop should emerge centrally from the cap top, with both tails inside.
- Secure the Hanging Loop: Tie the two tails together inside the cap with a firm square knot. Thread each tail in turn and sew twice through a separate R1 stitch and through the base of the loop. Knot the tails together again, weave each through at least 1 in (2.5 cm) of cap stitches, and trim. Tug the loop firmly by hand to test the attachment.
- Add the split ring: Open one 20 mm metal split ring only far enough to feed on the folded top of the Hanging Loop. Rotate the ring until the entire crocheted loop lies beyond both overlapping ring ends. Confirm that the ring is completely closed and no yarn is caught between its ends.
- Repeat Steps 1–7 for the other two ornaments.
Assembly check: Every completed ornament must contain exactly 2 Spiral Arms, 1 Cap Cup, 1 Hanging Loop, and 1 split ring. The set contains 6 arms, 3 caps, 3 loops, and 3 rings.
Finishing
Weave in any remaining nonstructural tails. Arrange each pair of arms so one color winds beside the other. If a spiral needs tidying, lightly mist it, twist it gently in its existing curl direction, and let it dry on a flat towel without stretching. Do not iron.
Perform a final pull test on every Hanging Loop. Inspect each split ring to ensure it is fully closed and that the reinforced cord cannot pull through it.
Customization Ideas
You can personalize the set without changing its construction or stitch counts:
- Choose two contrasting arm colors for each ornament while retaining one consistent cap-and-loop color across the set.
- Use metallic-look or subtly sparkling DK yarn for Color D, provided it remains comfortable to crochet at the stated gauge.
- Create a monochrome set by selecting different shades from one color family.
- Coordinate the four planned colors with gift wrapping, a holiday garland, or your existing tree decorations.
Changing yarn weight or hook size will alter the finished measurements and may affect how securely the cap fits, so make the complete set with the same yarn weight, hook, and tension.
Common Mistakes to Avoid
- Missing a foundation chain: Each Spiral Arm must have 25 groups of 4 hdc, for 100 hdc total.
- Counting joins as stitches: The Cap Cup’s joining sl sts are not included in the round totals.
- Working R4 through both loops: Work through the back loop only so the 18 unused front loops form the decorative rim and remain available for assembly.
- Cutting structural tails too soon: Keep the specified arm, cap, and loop tails until their assembly steps are complete.
- Twisting the Hanging Loop: Align both cord ends before attaching the loop to the cap.
- Overtightening the cap seam: The opening should hug the arm bundle without flattening or crushing the spirals.
- Leaving the split ring partly open: Rotate the loop beyond both overlapping ends and check that no yarn is trapped.
Troubleshooting
Why isn’t my Spiral Arm curling?
First count 25 groups and verify that every group contains 4 hdc. Then gently guide the fabric in its natural curl direction. Do not add stitches, change the count, or block the strip flat.
Why is one ornament longer than the others?
Compare yarn thickness, tension, the 25-group arm count, and Hanging Loop length. Consistent materials and tension are more important than exact gauge, but all components in the set should be worked consistently.
Why is my Cap Cup flat instead of cup-shaped?
Confirm that R4 contains 18 sc worked through the back loops only. That round turns the work downward and creates the shallow cup shape.
What should I do if the cap opening looks loose?
Check that all 18 front loops were caught in sequence during the whipstitched closure. Tighten the sewing yarn only enough to fit the opening around both arm tops, then secure it with the prescribed backstitches and knot.
My Hanging Loop pulls to one side. How can I fix it?
Before knotting, confirm that its ends pass through opposite sides of R1 and that the cord is not twisted. Center the folded loop above the MR, then complete the anchoring stitches through separate R1 stitches and the loop base.
Care Instructions
Dust gently or spot-clean according to the care directions for your yarn. If wet cleaning is necessary, use cool water and minimal agitation. Reshape the spirals in their existing curl direction and dry flat on a towel. Do not stretch, wring, or iron. Before rehanging, let the ornaments dry completely and inspect the loops, knots, and split rings.
Frequently Asked Questions
Is this pattern written in US terms?
Yes. All stitches and abbreviations use US crochet terminology.
How many pieces do I crochet?
You will crochet 12 pieces: 6 Spiral Arms, 3 Cap Cups, and 3 Hanging Loops. You will also attach 3 metal split rings.
Do these ornaments need stuffing?
No. The corkscrew arms create the ornament body, and the Cap Cup is sewn directly around their joined tops.
Is gauge essential?
Exact gauge is not critical, but consistent gauge keeps the three ornaments uniform and helps the caps fit the arm bundles.
Can I make the spirals longer by adding chains?
The tested construction plan uses exactly 26 foundation chains and 25 groups of 4 hdc. Adding chains changes the stitch count, yarn requirements, proportions, and finished measurements, so it is not part of this pattern.
Can I omit the split rings?
The defined construction includes one 20 mm split ring per ornament. It provides a secure attachment point and should be fully rotated onto the reinforced Hanging Loop.
Are these ornaments suitable as toys?
No. They are decorative items containing small metal hardware and hanging cords. Keep them away from young children and pets.