

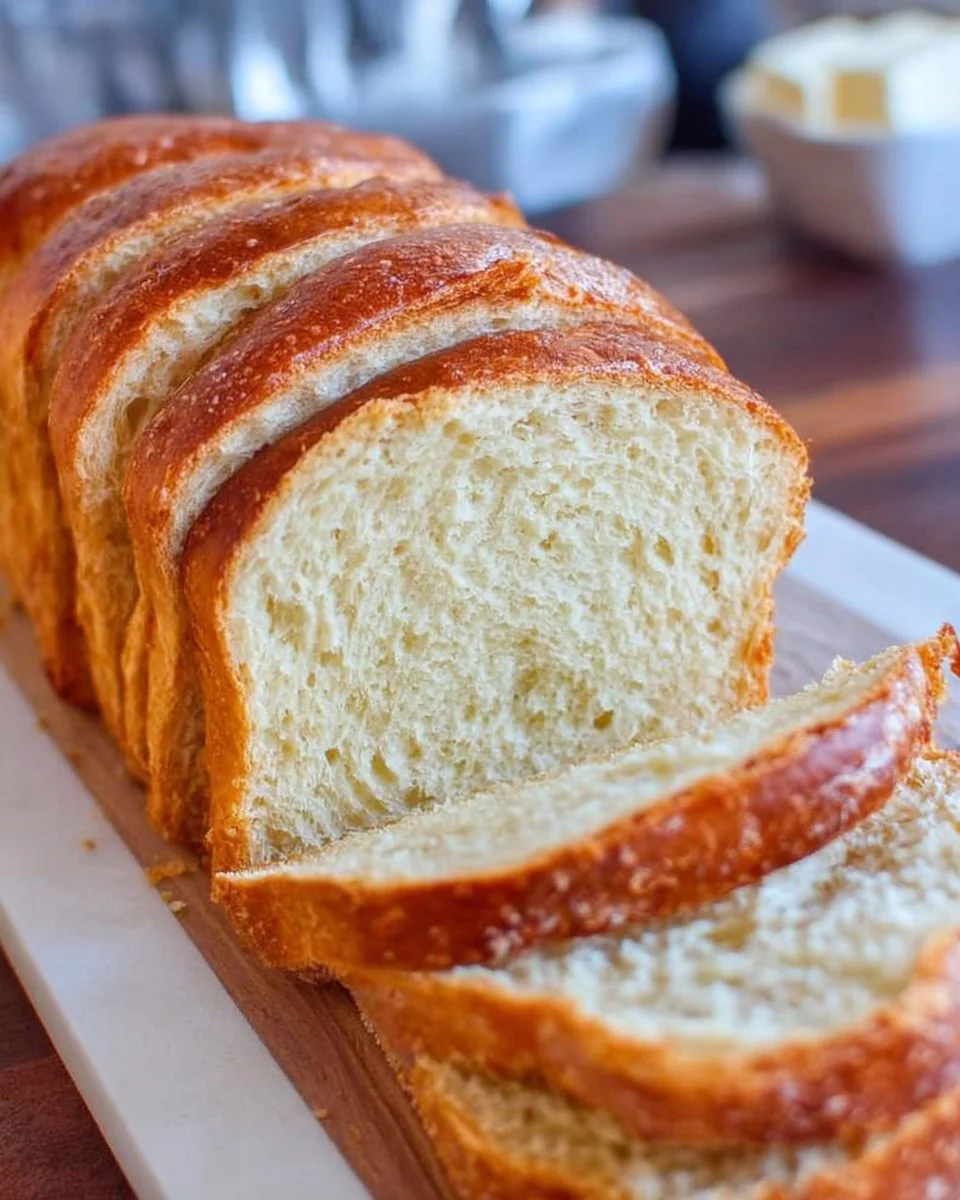
Imagine a kitchen infused with the warm, inviting aroma of freshly baked bread, where the very air tastes like comfort and home. As the soft, golden crust forms, you can hear a gentle crackle that promises a rewarding crunch. Each slice reveals a tender, pillowy crumb, light and airy yet substantial enough to hold butter, jam, or any of your favorite spreads. The anticipation of tearing into that loaf fills the heart with warmth and joy, transforming an ordinary day into something extraordinary.
This Easy White Bread is more than a recipe; it’s an experience. The texture is soft yet sturdy, perfect for sandwiches or simply toasted with a smear of rich butter. The slightly sweet flavor dances on your palate, embracing you like a cozy hug. Whether you choose to savor it plain, layer it with your favorite toppings, or pair it with a hearty soup, this homemade bread elevates every meal into a celebration. Creating this white bread fills your home with not just delightful scents, but also pure happiness—your very own slice of bliss.
Why You’ll Love This Easy White Bread
If you’ve ever bitten into a perfectly baked slice of white bread, you know it has a way of making the world feel right. This Easy White Bread stands out for several reasons: it’s simple yet incredibly satisfying, making it an ideal choice for novice bakers and seasoned pros alike. The process requires minimal ingredients, yet each one plays a vital role in creating that perfect loaf.
Picture yourself gathering around the table, sharing freshly sliced bread with family and friends. Whether it’s a casual Sunday brunch or an everyday dinner, this bread effortlessly complements any occasion. Its versatility knows no bounds; serve it with rich gravies, roast beef, or even as the foundation for a classic PB&J. With each bite, you’ll discover the joy of homemade that store-bought simply cannot match.
Preparation Phase & Tools to Use
Creating your Easy White Bread requires only a few essential tools, each crucial in nurturing your culinary endeavor.
- Mixing Bowl: A large, sturdy bowl is vital for combining the dough smoothly.
- Spatula: This helps integrate your ingredients as they come together into a shaggy mixture.
- Floured Surface: A clean, lightly floured space allows you to knead the dough effectively, ensuring it develops that desirable elasticity.
- Loaf Pan: Use a greased 9×5-inch loaf pan to give your dough the perfect shape for baking.
- Kitchen Towel: Cover the dough while it rises to keep it warm and protected from drafts—a key factor in a successful rise.
- Wire Rack: A cooling rack allows the bread to breathe and cool evenly after baking.
Prior to diving into the recipe, prepare your space. Clear a countertop, gather your tools, and allow your ingredients to come to room temperature. This attention to detail sets the stage for a fantastic baking experience.
Ingredients for Easy White Bread
To create your perfect loaf, you prompted to gather the following key ingredients:
- 3 cups all-purpose flour: This forms the backbone of your bread, providing strength and structure. You can substitute with bread flour for a slightly chewier texture.
- 1 tablespoon sugar: This little bit of sweetness enhances flavor and aids in browning the crust. Feel free to use honey or agave syrup if you prefer.
- 1 teaspoon salt: Salt is essential for flavor; it balances the sweetness and helps control yeast activity.
- 1 tablespoon active dry yeast: This tiny powerhouse creates the rise and fluffy texture. Make sure it’s fresh for the best results.
- 1 cup warm water: The ideal temperature activates the yeast—think comfortably warm, around 110°F (43°C).
- 2 tablespoons vegetable oil: This adds moisture and extends shelf life. You can substitute with olive oil or melted butter for a richer flavor.
How to Make Easy White Bread
The making of this bread is a delightful journey, filled with sensory excitement. Here’s how you create this masterpiece:
-
Activate the Yeast: Pour 1 cup of warm water into a large mixing bowl. Sprinkle the active dry yeast over the surface and let it sit for about 5 minutes. Watch as it froths and bubbles to life—this means your yeast is good to go.
-
Combine Ingredients: Stir in the sugar, salt, and vegetable oil until everything is well combined. The mixture should start looking smooth and inviting.
-
Form the Dough: Gradually add the flour to the mixture while stirring with a spatula. Continue until a shaggy dough forms, which will take a bit of elbow grease but excites the baker within.
-
Knead the Dough: Dust a clean surface lightly with flour and transfer the dough onto it. Knead for about 8-10 minutes, pushing and folding until the dough becomes smooth and elastic. You’ll discover a comforting warmth emanating from the dough as it comes together.
-
First Rise: Place your kneaded dough into a greased bowl, cover it with a kitchen towel, and let it rise in a warm spot for about 1 hour. It should double in size, a magical transformation that signals success.
-
Shape Your Loaf: After an hour, gently punch down the dough to release excess air and then shape it into a loaf.
-
Final Rise: Place the shaped loaf into a greased 9×5-inch loaf pan. Cover it again and let it rise for another 30 minutes. This rise deepens the flavor and texture.
-
Preheat the Oven: As your dough finishes its final rise, preheat your oven to 350°F (175°C).
-
Bake to Perfection: Bake for 25-30 minutes until the crust turns golden brown and sounds hollow when tapped at the bottom. This symphony of scent leads you to the edge of pure satisfaction.
-
Cool and Slice: Allow the loaf to cool in the pan for a few minutes before transferring it to a wire rack. Patience is key! Let it cool completely before slicing to capture the best texture.
Chef’s Notes & Helpful Tips
-
Make-Ahead Tips: You can prepare this dough in advance and refrigerate it after the first rise; it will develop deeper flavors overnight. Just ensure it comes to room temperature and rises again before baking.
-
Cooking Alternatives: If you’re short on time, use an air fryer configured for baking to achieve the same delightful crust and fluffiness.
-
Customization Ideas: Experiment by adding herbs, cheese, or spices into the dough for unique flavor profiles. You might find that a sprinkle of rosemary or some garlic powder creates magic.
Common Mistakes to Avoid
Achieving the perfect loaf requires attention to detail. Here’s how to steer clear of common pitfalls:
-
Not Activating Yeast Properly: Ensure your water is warm, not hot; too hot will kill the yeast. Always check the expiration date on your yeast to ensure it’s still active.
-
Over-Kneading the Dough: While kneading is essential, overdoing it can create a tough texture. Stop kneading once the dough is smooth and elastic.
-
Skipping the Second Rise: This step is crucial for developing the airy texture. Don’t rush this process; the wait is worth it.
What to Serve With Easy White Bread
A fresh loaf of Easy White Bread opens a world of culinary possibilities. Here are some delightful pairings:
- Homemade Jam: Spread your favorite fruit preserves for a classic breakfast treat.
- Butter: A simple, generous smear of salted butter melts into the warm bread, creating pure indulgence.
- Hearty Soups: Serve alongside creamy tomato soup or a thick lentil stew for a comforting meal.
- Sandwiches: Layer with turkey, lettuce, and your favorite condiments for a satisfying lunch.
- Garlic Bread: Spread with a garlic butter mixture and toast until golden for a delicious side dish.
- Eggs: Toast slices and top with poached eggs for brunch that feels gourmet yet simple.
- Salads: Use as a base for bruschetta or serve diced in a panzanella salad.
- Cheese: Pair with an array of cheeses and charcuterie for an elevated snack.
Storage & Reheating Instructions
To prolong the life of your delicious loaf, store it at room temperature in a bread box or wrapped in a clean kitchen towel, which helps maintain its moisture.
-
Fridge: Avoid refrigerating bread, as it can dry it out. Instead, keep it at room temperature for optimal softness.
-
Freezer: If you wish to freeze, slice the bread first and then wrap it tightly with plastic wrap followed by aluminum foil. This method keeps it fresh for up to 3 months.
-
Reheating: For a warm, fresh taste, toast slices in a toaster or pop the whole loaf into a 350°F (175°C) oven for 10-15 minutes until warmed through.
Estimated Nutrition Information
Enjoy your homemade Easy White Bread with the knowledge that you’ve crafted something wholesome. Here’s an approximate breakdown for one slice (based on 12 slices per loaf):
- Calories: 120
- Protein: 3g
- Carbohydrates: 22g
- Fat: 2g
- Fiber: 1g
- Sugar: 0.5g
(Values are estimates and may vary based on ingredients used)
FAQs
Can I make this bread using whole wheat flour?
Absolutely! You can substitute up to half of the all-purpose flour with whole wheat flour for a heartier, nuttier flavor. Just be mindful that the texture may become denser.
What if my dough doesn’t rise?
This can happen if your yeast was inactive. Check the expiry date on your yeast and ensure the water temperature is ideal (warm, not hot). If it doesn’t rise, you might need to try with fresh yeast.
How long will the bread last?
When stored properly, this bread stays fresh at room temperature for about 3-4 days. Freezing extends its life significantly, keeping it tasty for multiple months.
Can I add seeds or nuts to the recipe?
Yes! Feel free to fold in seeds, nuts, or even dried fruits into the dough during the kneading phase for added flavor and texture.
Is it possible to make this bread gluten-free?
With the right gluten-free flour blend, you can try adapting this recipe. Just ensure to follow package instructions related to water ratios and rising times.
Conclusion
Baking this Easy White Bread transforms your kitchen into a sanctuary of warmth and joy. Each ingredient plays its part in crafting a comforting loaf that resonates with love and care. Embrace the adventure of baking, allow the aromas to swirl around you, and relish the countless ways to enjoy your creation. So, roll up your sleeves and dive in—after all, nothing brings people together like the smell of freshly baked bread.
Print
Easy White Bread
- Prep Time: 15 minutes
- Cook Time: 30 minutes
- Total Time: 45 minutes
- Yield: 12 servings 1x
- Category: Bread
- Method: Baking
- Cuisine: American
- Diet: Vegetarian
Description
A simple yet incredibly satisfying bread recipe that creates a soft, airy loaf perfect for sandwiches or simply toasted. Enjoy the comforting aroma of freshly baked bread in your home.
Ingredients
- 3 cups all-purpose flour
- 1 tablespoon sugar
- 1 teaspoon salt
- 1 tablespoon active dry yeast
- 1 cup warm water
- 2 tablespoons vegetable oil
Instructions
- Pour 1 cup of warm water into a large mixing bowl. Sprinkle the active dry yeast over the surface and let it sit for about 5 minutes.
- Stir in the sugar, salt, and vegetable oil until well combined.
- Gradually add the flour to the mixture while stirring with a spatula.
- Dust a clean surface lightly with flour and transfer the dough onto it. Knead for about 8-10 minutes.
- Place your kneaded dough into a greased bowl, cover it with a kitchen towel, and let it rise in a warm spot for about 1 hour.
- Punch down the dough to release excess air and then shape it into a loaf.
- Place the shaped loaf into a greased 9×5-inch loaf pan. Cover it again and let it rise for another 30 minutes.
- Preheat your oven to 350°F (175°C).
- Bake for 25-30 minutes until the crust turns golden brown.
- Allow the loaf to cool in the pan for a few minutes before transferring it to a wire rack.
Notes
For additional flavors, consider adding herbs, cheese, or spices into the dough. Allowing the dough to rest overnight in the refrigerator can also develop deeper flavors.
Nutrition
- Serving Size: 1 slice
- Calories: 120
- Sugar: 0.5g
- Sodium: 220mg
- Fat: 2g
- Saturated Fat: 0g
- Unsaturated Fat: 1g
- Trans Fat: 0g
- Carbohydrates: 22g
- Fiber: 1g
- Protein: 3g
- Cholesterol: 0mg