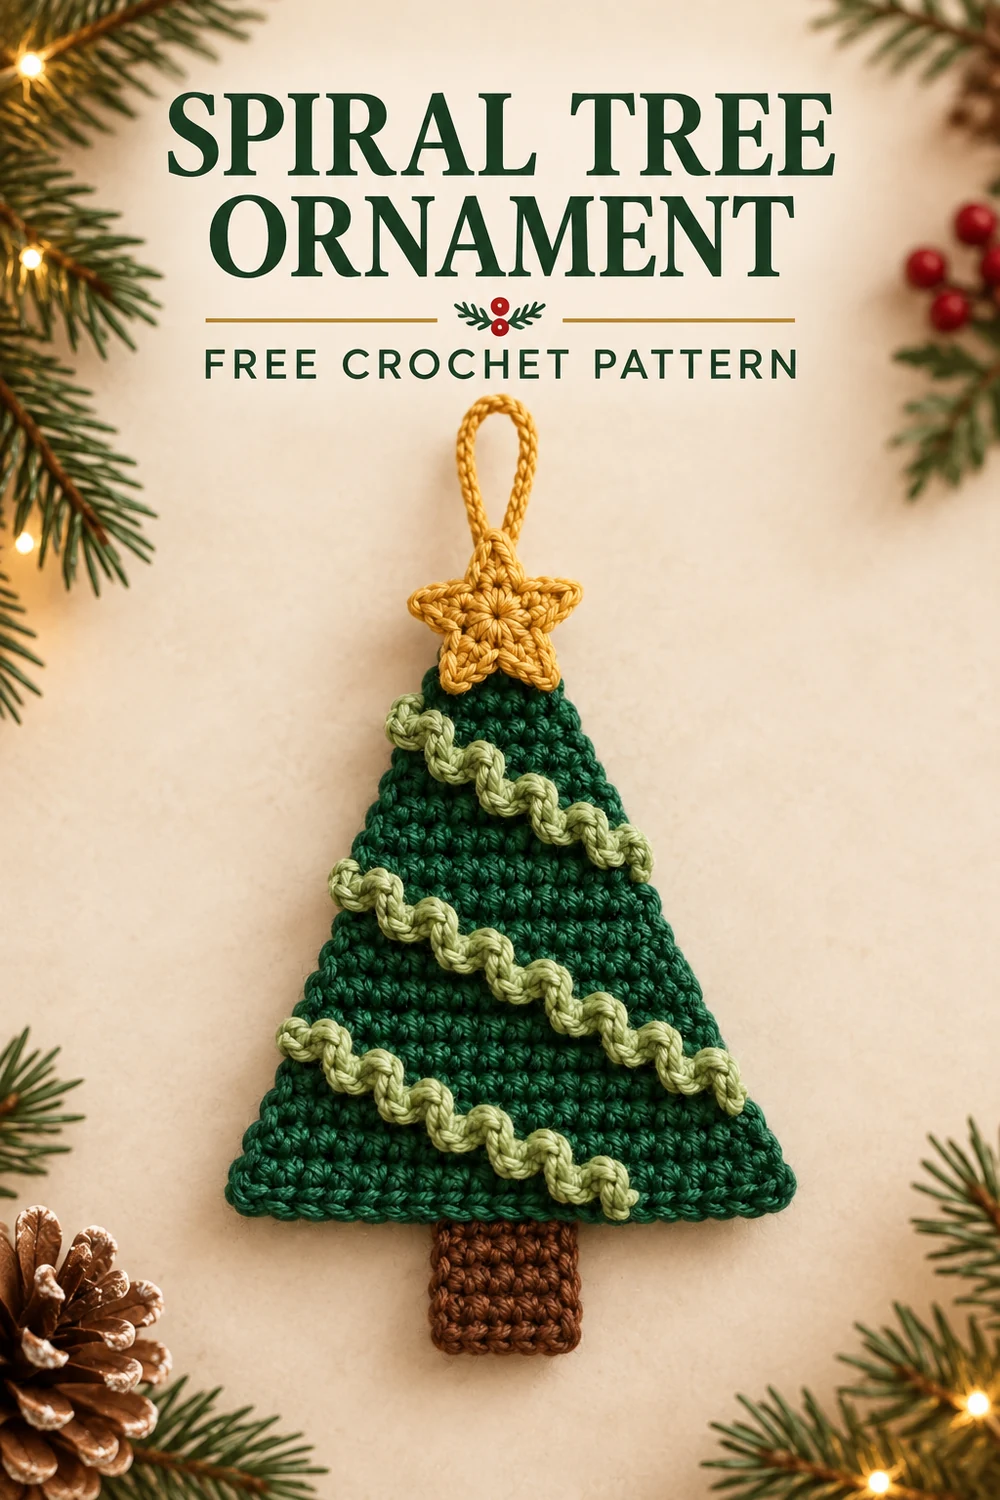
Spiral Tree Ornament: Free Crochet Pattern
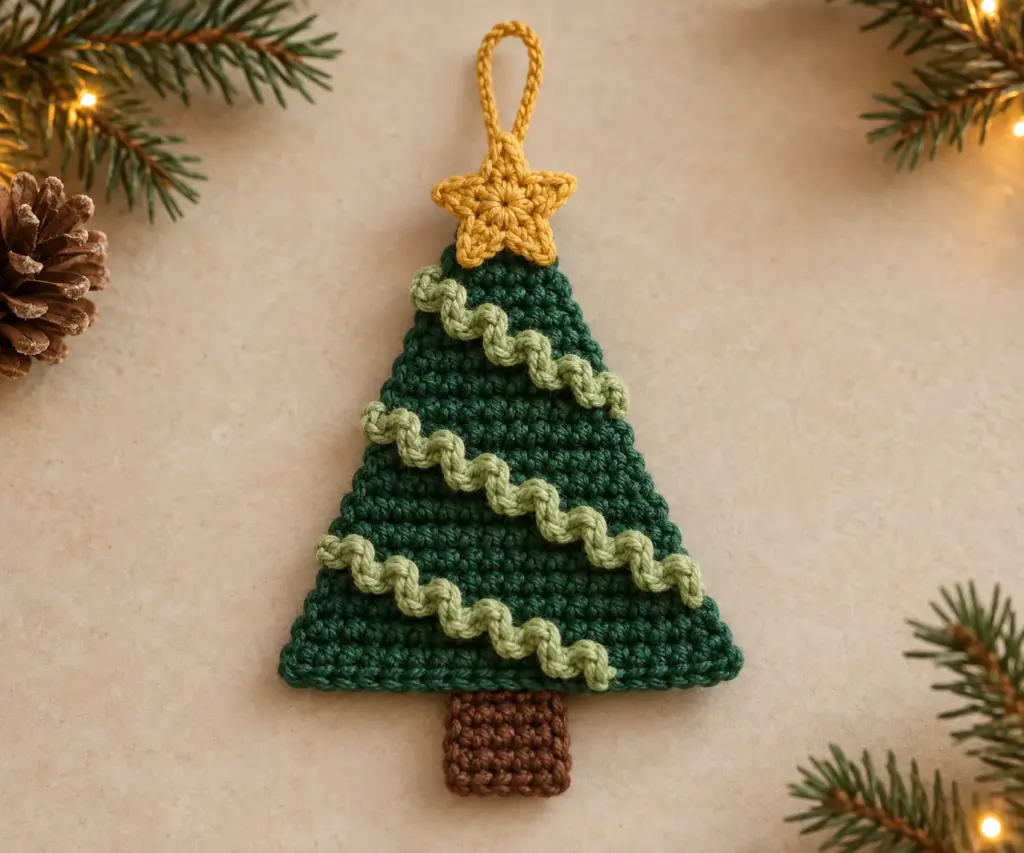
Crochet a festive flat tree ornament with a textured corkscrew garland, a neat brown trunk, a five-point gold star, and a sturdy crocheted hanging loop. This original design uses simple US crochet stitches and is suitable for confident beginners. No stuffing is required.

Pattern at a Glance
- Skill level: Easy
- Terminology: US crochet terms
- Construction: Five separately crocheted components assembled into one flat ornament
- Visible components: One forest-green triangular tree panel, one light-green corkscrew spiral garland, one brown rectangular trunk tab, one gold five-point star topper, and one gold crocheted hanging loop
- Main techniques: Chains, slip stitches, single crochet, increases, double crochet, back-bump crochet, seaming, and working into a magic ring
- Finished size: Approximately 5 in (12.5 cm) tall, excluding the hanging loop, and 4.5 in (11.5 cm) wide after blocking
- Stuffing: None
Materials You’ll Need
- Worsted-weight category 4 acrylic or cotton yarn: approximately 18 yd (16.5 m) forest green
- Approximately 8 yd (7.5 m) light green
- Approximately 4 yd (3.7 m) brown
- Approximately 6 yd (5.5 m) gold
- US G/6 (4 mm) crochet hook, or size needed to obtain gauge
- Yarn needle
- Scissors
- Locking stitch markers
- Rust-resistant sewing pins
- Ruler
- Optional commercial ornament hook
Smooth, firmly plied yarn will produce the clearest tree edges, spiral texture, and star shape. The crocheted hanging loop is the load-bearing attachment, so a commercial hook is optional.
Gauge
16 sc and 16 rows = 4 in (10 cm) in rows of single crochet, measured after light blocking.
Exact gauge is not critical, but a different gauge will change the finished dimensions and yarn requirements.
Finished Measurements
- Complete ornament: approximately 5 in (12.5 cm) tall, excluding the hanging loop
- Tree width: approximately 4.5 in (11.5 cm) after blocking
- Blocked tree panel height: approximately 4 in (10 cm)
- Trunk tab: approximately 1 in (2.5 cm) wide by 0.75 in (2 cm) tall
- Star: approximately 1.75 in (4.5 cm) in diameter
- Hanging-loop strip before joining: approximately 5.5–6 in (14–15 cm)
Crochet Abbreviations
- BLO = back loop only
- ch = chain
- dc = double crochet
- hdc = half double crochet
- inc = work 2 single crochet in the indicated stitch
- MR = magic ring
- rep = repeat
- RS = right side
- sc = single crochet
- sl st = slip stitch
- st(s) = stitch(es)
- WS = wrong side
Important Pattern Notes
- Turning chains do not count as stitches.
- Work the first stitch of each row in the first stitch unless instructed otherwise.
- An increase means to work 2 sc in one stitch.
- Place a marker on the RS of the tree panel.
- Crochet the garland into the back bumps of its foundation chain. The concentrated increases make it curl naturally.
- Do not stretch, steam, or block the spiral garland flat.
- Leave every sewing tail at the length specified. These tails are used during assembly.
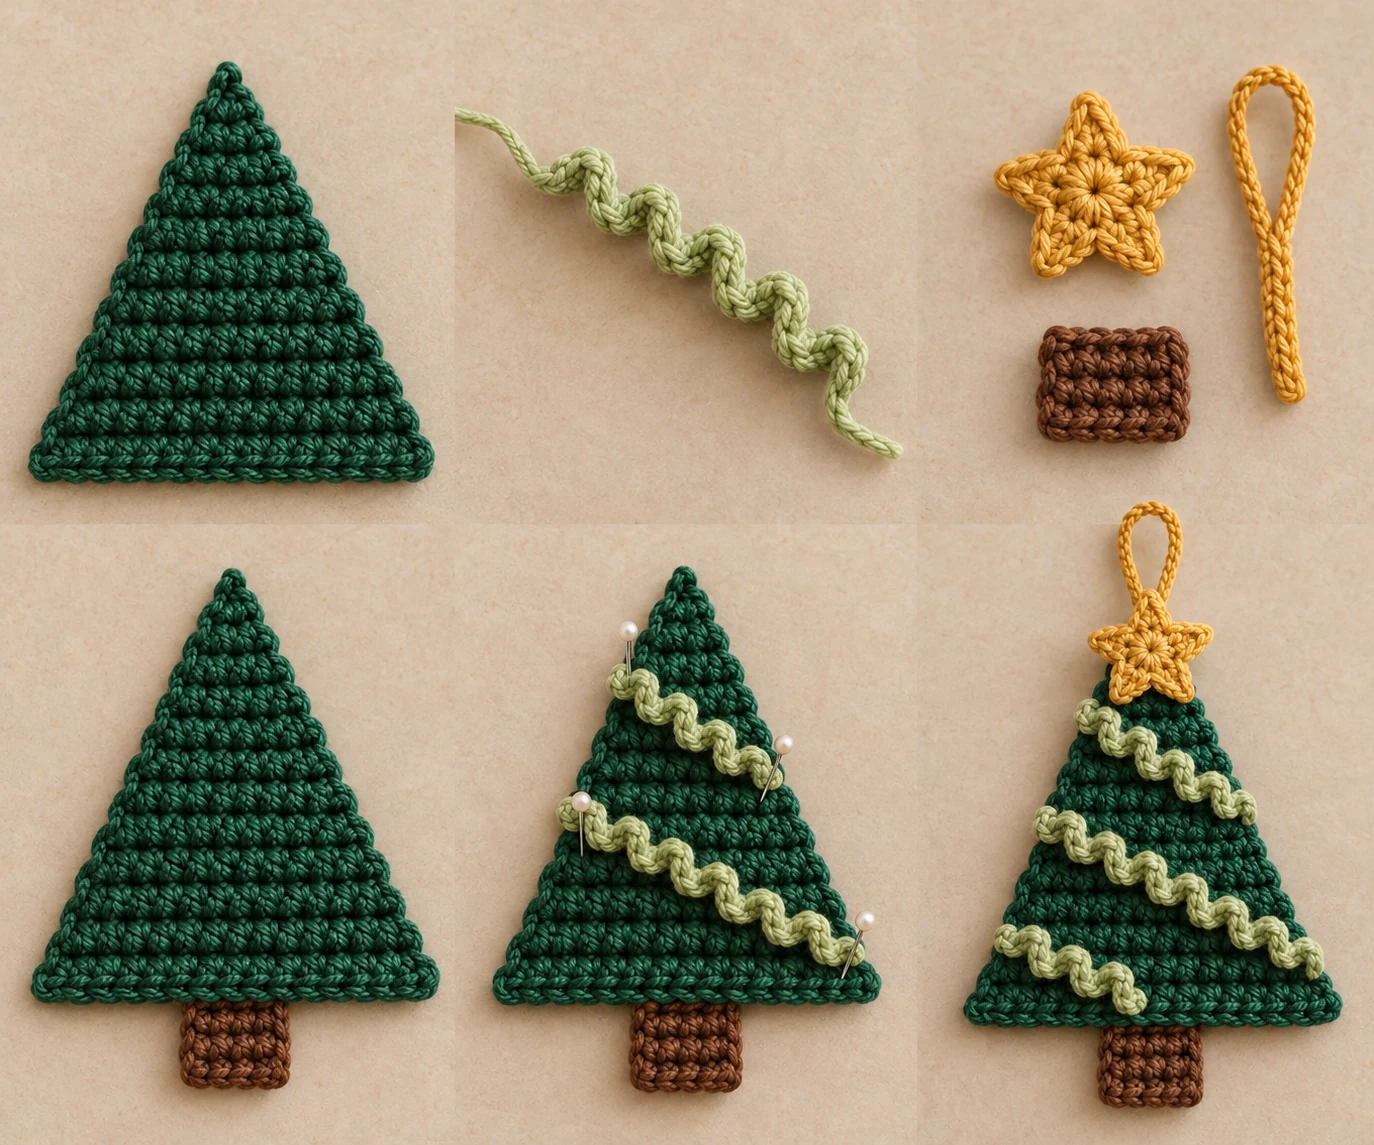
- The pattern contains five written components: Triangular Tree Panel, Corkscrew Spiral Garland, Trunk Tab, Five-Point Star Topper, and Hanging Loop.
Complete Free Crochet Pattern
Component 1: Triangular Tree Panel
Quantity: 1
Color: Forest green
Fastening-off tail: 24 in (61 cm)
Ch 3.
Row 1 (WS): Work 2 sc in second ch from hook. Turn. (2 sc)
Row 2: Ch 1, inc in each st. Turn. (4 sc)
Row 3: Ch 1, inc in first st, sc in next 2 sts, inc in last st. Turn. (6 sc)
Row 4: Ch 1, inc in first st, sc in next 4 sts, inc in last st. Turn. (8 sc)
Row 5: Ch 1, inc in first st, sc in next 6 sts, inc in last st. Turn. (10 sc)
Row 6: Ch 1, inc in first st, sc in next 8 sts, inc in last st. Turn. (12 sc)
Row 7: Ch 1, inc in first st, sc in next 10 sts, inc in last st. Turn. (14 sc)
Row 8: Ch 1, inc in first st, sc in next 12 sts, inc in last st. Turn. (16 sc)
Row 9: Ch 1, inc in first st, sc in next 14 sts, inc in last st. Turn. (18 sc)
Row 10 (RS): Ch 1, inc in first st, sc in next 16 sts, inc in last st. (20 sc)
Fasten off, leaving the specified tail. Lightly block the panel to approximately 4.5 in (11.5 cm) wide and 4 in (10 cm) tall.
Component 2: Corkscrew Spiral Garland
Quantity: 1
Color: Light green
Tails: Leave 12 in (30 cm) at both ends
Ch 41.
Row 1: Work 3 sc in the back bump of second ch from hook and 3 sc in the back bump of each remaining ch. (120 sc)
Fasten off. Gently rotate the curls in one consistent direction without stretching them. The foundation-chain edge forms the center spine that will be sewn to the tree.

Component 3: Trunk Tab
Quantity: 1
Color: Brown
Fastening-off tail: 12 in (30 cm)
Ch 5.
Row 1: Sc in second ch from hook and in each remaining ch. Turn. (4 sc)
Rows 2–3: Ch 1, sc in each st. Turn. (4 sc per row)
Fasten off, leaving the specified tail. The tab should measure approximately 1 in (2.5 cm) wide by 0.75 in (2 cm) tall.
Component 4: Five-Point Star Topper
Quantity: 1
Color: Gold
Fastening-off tail: 15 in (38 cm)
Make an MR.
Round 1: Rep the following sequence 5 times into the MR: ch 3, 2 dc, ch 3, sl st into the MR. (5 points; 10 dc total)
Fasten off, leaving the specified tail, and close the MR firmly. Each ch-3 rise, pair of dc, and ch-3 return creates one rounded triangular point. Shape the five points evenly. The finished diameter is approximately 1.75 in (4.5 cm).
Component 5: Hanging Loop
Quantity: 1
Color: Gold
Tails: Leave 8 in (20 cm) at both ends
Ch 25.
Row 1: Sl st in second ch from hook and in each remaining ch. (24 sl sts)
Fasten off. The strip should measure approximately 5.5–6 in (14–15 cm) before its ends are joined.
Assembly
- Place the tree panel RS up, with Row 1 at the top and Row 10 at the bottom.
- Center the trunk behind the bottom edge. Overlap Trunk Row 3 behind Tree Row 10 by approximately 0.25 in (6 mm), spanning the center four stitches of Tree Row 10. Using the brown tail, whipstitch the overlapping trunk edge to the WS loops of those four tree stitches. Add one small stitch at each upper trunk corner so the tab cannot pivot. Knot securely on the WS and weave in the tail.
- Arrange the spiral garland on the RS in a descending zigzag. Position its starting end at the left edge of Tree Row 3, cross it to the right edge of Tree Row 5, return it to the left edge of Tree Row 7, and finish at the right edge of Tree Row 10. Divide the foundation-chain spine approximately evenly among the three diagonal sections. Allow the sc curls to project away from the panel.
- Thread the garland’s starting tail through the foundation-chain spine and sew it securely to the edge stitch of Tree Row 3. Use the ending tail to secure the opposite end to the edge stitch of Tree Row 10. Thread a yarn needle with a doubled 30 in (76 cm) strand of light-green yarn. Tack the foundation-chain spine at the right edge of Row 5 and the left edge of Row 7, then add small tacking stitches through the spine and panel approximately every 0.75 in (2 cm) between those anchors. Do not sew through the outer curled sc edges. Knot on the WS and weave in all light-green tails.
- Center the star over the tree tip. Its lower point should overlap Tree Rows 1–2 while its upper point extends above the panel. Using the gold sewing tail, stitch around the lower point and the two adjacent inner valleys, catching the tree panel without flattening the other three points. Knot securely on the WS and weave in the tail.
- Bring the two hanging-loop ends together without twisting the strip. On the WS, place both ends directly behind the star and overlap each end downward across Tree Rows 1–3 by approximately 1 in (2.5 cm). With one loop tail, sew a boxed rectangle through both loop ends and the tree panel. Stitch an X across the box, then repeat the X once for reinforcement. Knot securely. Use the second tail to sew a separate boxed rectangle through the same layers. Knot securely and weave in both tails. The two independent attachments make the loop load-bearing even if one sewing strand loosens.
- Use the forest-green panel tail to neaten any visible assembly stitches on the WS. Weave the tail through at least 2 in (5 cm) of dense stitches in three directions before trimming.
Finishing
Lightly steam- or wet-block only the tree panel, trunk, and star as needed, using a method and temperature appropriate for the yarn fiber. Protect the spiral from steam and reshape each curl by hand. Allow the ornament to dry completely before hanging it.
Hang the ornament directly from its crocheted loop or pass a commercial ornament hook through the top of the loop. If using a metal hook, close its lower bend with pliers so it cannot slip free. This ornament is decorative and is not a toy.
Customization Ideas
Customize the ornament through color and yarn choice while retaining all specified stitch counts and components. Try snowy white or metallic light-green yarn for the garland, coordinate the tree with your holiday décor, or use a contrasting gold shade for the star and loop. A smooth cotton yarn creates crisp definition, while acrylic produces a softer look. Maintain a similar worsted weight across all colors so the components remain proportional.
Common Mistakes to Avoid
- Counting the turning chain: Turning chains do not count as stitches in the tree or trunk.
- Missing edge increases: Rows 3–10 of the tree each increase at both ends. The panel should gain exactly two stitches per row.
- Using the wrong part of the garland chain: Work into the back bumps so the foundation-chain spine remains neat and easy to sew.
- Flattening the spiral: Block the tree panel separately and keep heat and moisture away from the garland.
- Sewing through the curls: Tack only the central foundation-chain spine so the outer sc stitches stay dimensional.
- Twisting the hanging loop: Align both ends before sewing and check that the loop lies smoothly.
- Attaching the loop lightly: Use both tails to create independent reinforced attachments as instructed.
Troubleshooting
Why is my tree panel leaning?
Check that every row begins in the first stitch and that both edge increases are present. The final rows should contain 2, 4, 6, 8, 10, 12, 14, 16, 18, and 20 stitches in sequence.
Why is the garland not curling?
Confirm that you worked 3 sc in every one of the 40 available chain back bumps for 120 sc total. Gently rotate the developing curls in one consistent direction.
Why does the garland look uneven on the tree?
Before sewing, divide the spine approximately evenly between the four anchors: left edge of Row 3, right edge of Row 5, left edge of Row 7, and right edge of Row 10.
Why does the trunk swing sideways?
Confirm that it overlaps the center four stitches of Tree Row 10 and that both upper trunk corners have an additional securing stitch.
Why does the star collapse?
Close the magic ring firmly, shape all five points, and sew only around the lower point and its two adjacent valleys. Avoid compressing the remaining points.
Care Instructions
Spot-clean when possible. For washable yarn, gently hand-wash in cool water with mild detergent, supporting the ornament so the assembly is not stretched. Do not wring. Press out moisture in a towel, reshape the tree, trunk, and star, and arrange the garland curls by hand. Dry flat and store without crushing the spiral or bending the star.
Frequently Asked Questions
Is this pattern written in US or UK terms?
It uses US crochet terminology.
Can a beginner make this ornament?
Yes. The stitches are basic, although working into chain back bumps and sewing the garland neatly may require patience.
Does the ornament need stuffing?
No. It is a flat ornament, and no stuffing is used.
Can I change the hook size?
Yes. Use the hook needed to achieve the stated gauge, remembering that a different gauge changes the finished dimensions and yarn usage.
Do I need a metal ornament hook?
No. The reinforced crocheted loop is designed as the load-bearing attachment. A commercial hook is optional.
Can I block the whole ornament after assembly?
Protect the corkscrew garland from steam and avoid flattening it. Lightly block only the tree panel, trunk, and star, then reshape the curls by hand.