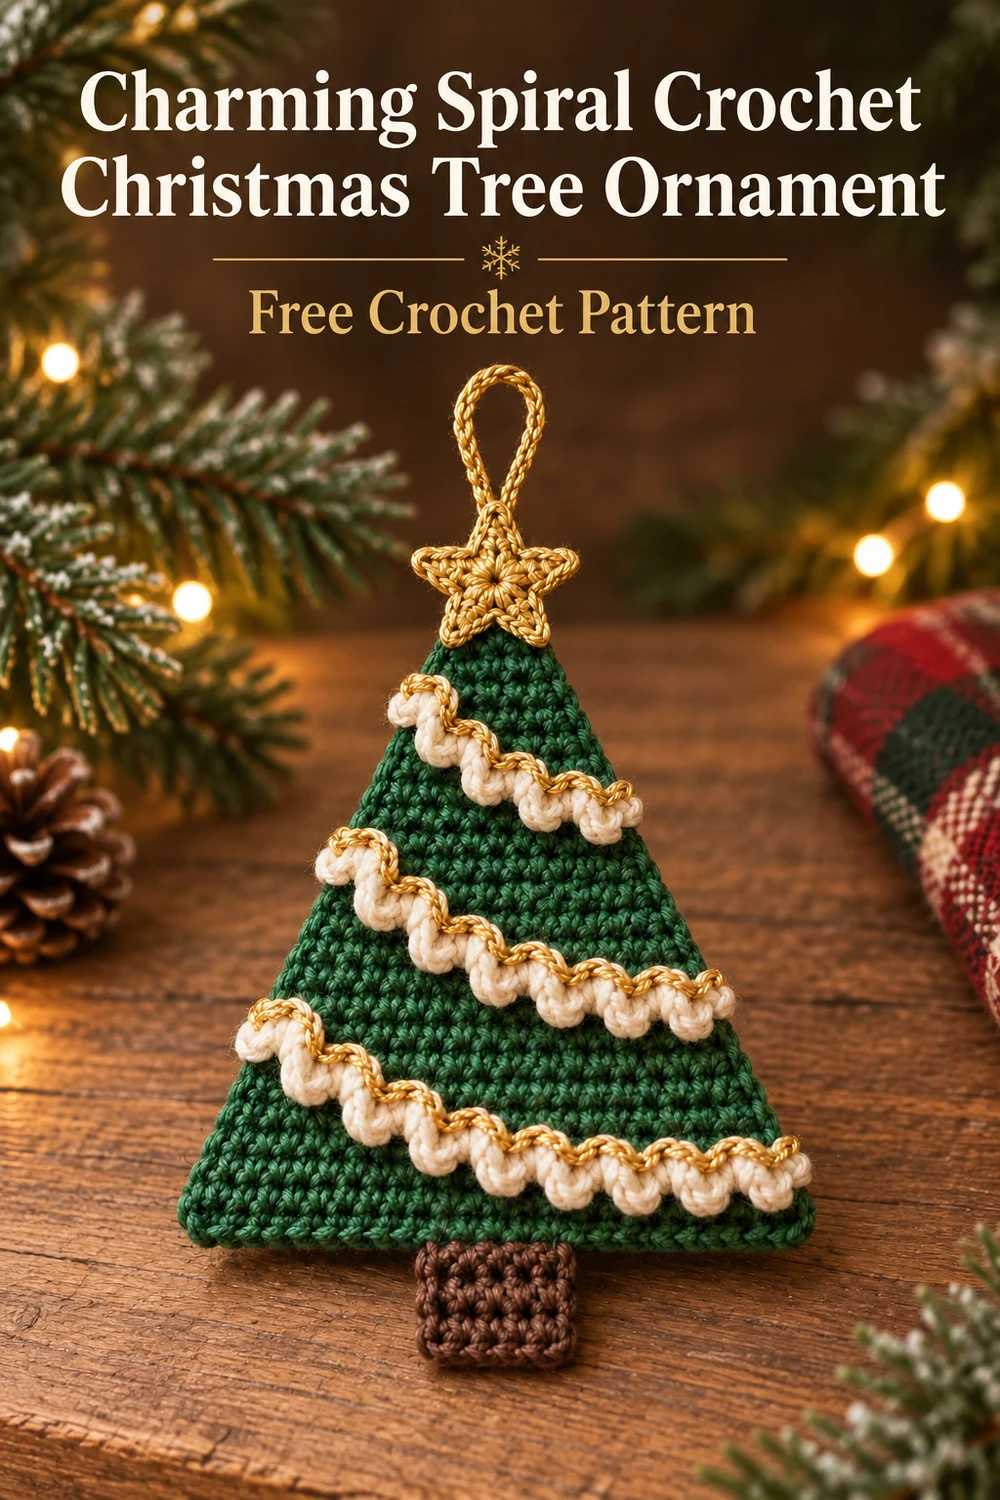
Charming Spiral Crochet Christmas Tree Ornament
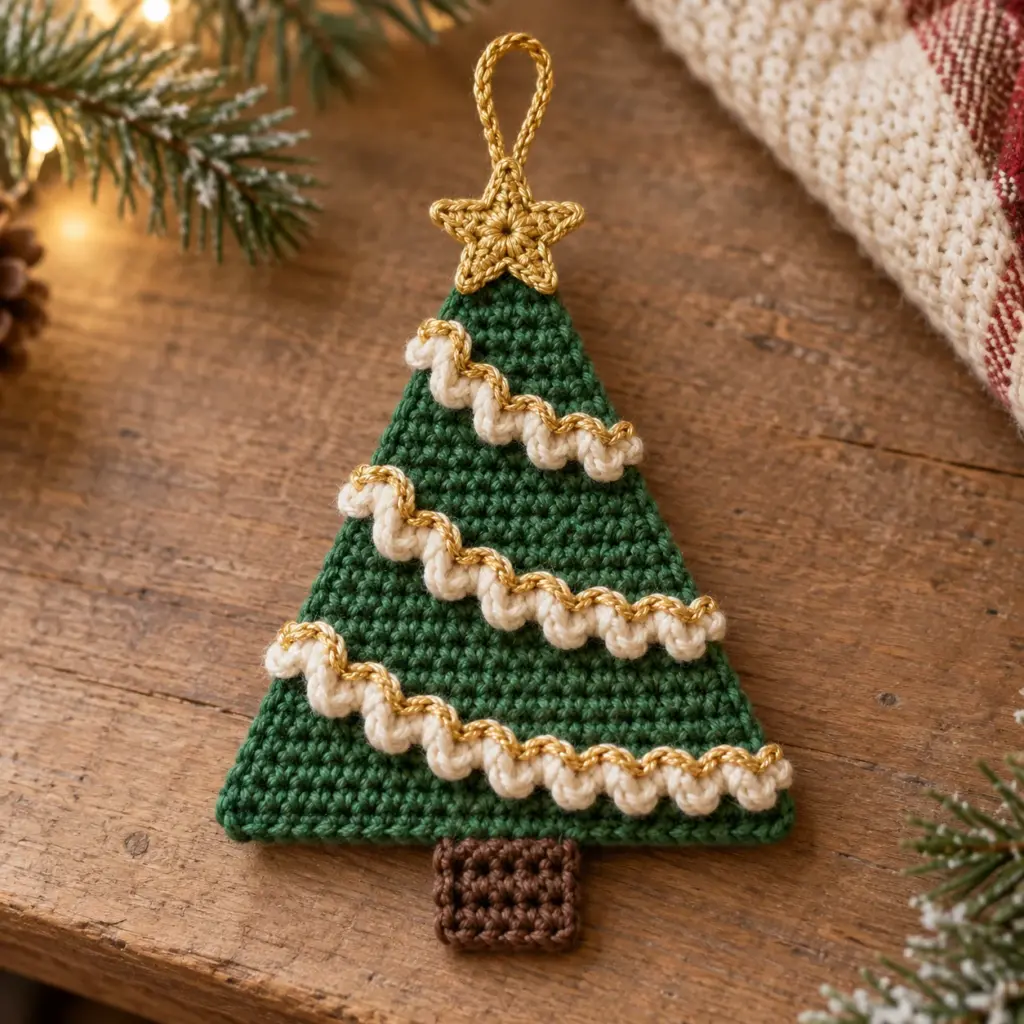
Bring handmade texture to your holiday décor with this free crochet Christmas tree ornament pattern. The original flat design combines one evergreen tree triangle, one brown trunk rectangle, one cream-and-gold spiral garland, one gold five-point star, and one gold crocheted hanging loop. The naturally curling garland creates dimension without stuffing, wire, beads, or metal hardware.
Pattern at a Glance
- Skill level: Easy
- Terminology: US crochet terms
- Construction: Separate flat pieces sewn together
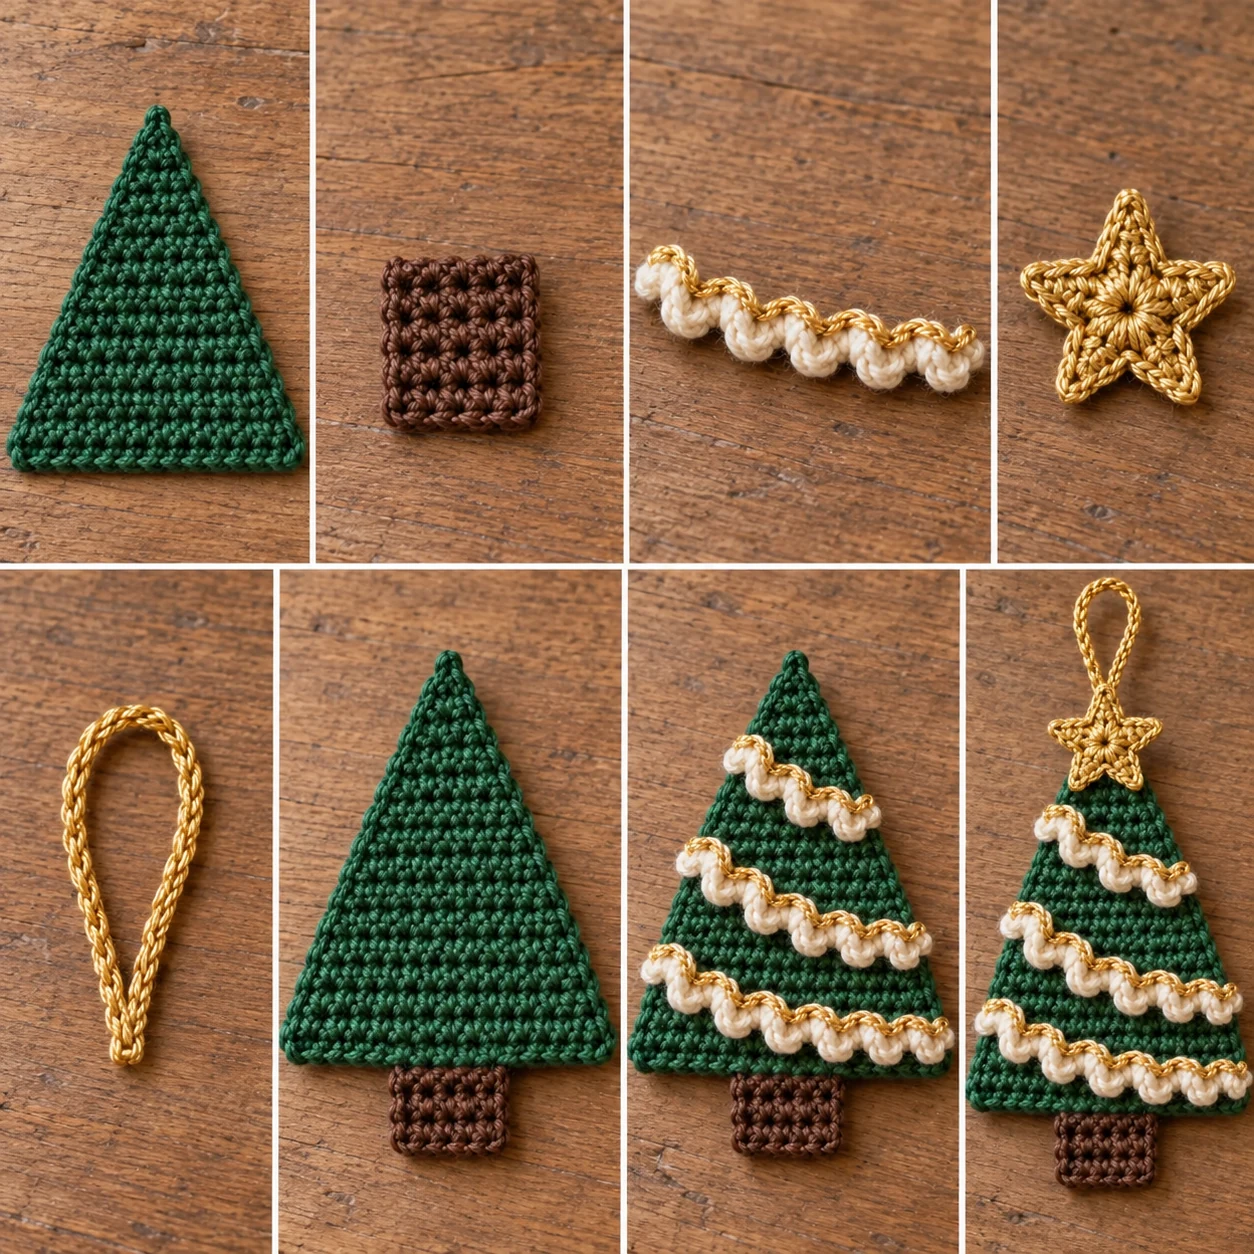
- Visible crocheted components: 1 evergreen tree triangle, 1 brown trunk rectangle, 1 cream-and-gold spiral garland, 1 gold five-point star, and 1 gold crocheted hanging loop
- Stuffing or hardware: None
Materials You’ll Need
- 20 yd (18 m) worsted-weight category 4 yarn in evergreen
- 5 yd (4.5 m) worsted-weight category 4 yarn in brown
- 8 yd (7.5 m) worsted-weight category 4 yarn in cream
- 8 yd (7.5 m) metallic gold or gold-colored worsted-weight category 4 yarn
- US G/6 (4 mm) crochet hook
- Yarn needle
- Scissors
- Locking stitch markers
- Optional rustproof straight pins for positioning pieces before sewing
Smooth cotton, acrylic, or a cotton-acrylic blend works well. Choose yarns of similar weight so the individual components remain proportional.
Gauge
18 sc and 20 rows = 4 in (10 cm) in unblocked single crochet. Exact gauge is not critical, but the fabric should be firm enough to hold its shape. Adjust the hook size if necessary.
Finished Measurements
Approximately 5 in (12.5 cm) tall from the trunk base to the star tip, excluding the hanging loop, and approximately 4.5 in (11.5 cm) wide across the tree base. The flattened hanging loop adds approximately 2.5 in (6.5 cm).
Crochet Abbreviations
- beg = beginning
- ch = chain
- dc = double crochet
- MR = magic ring
- rep = repeat
- sc = single crochet
- sc2tog = single crochet 2 stitches together
- sl st = slip stitch
- st(s) = stitch(es)
Important Pattern Notes
- Turning chains do not count as stitches.
- Work the Evergreen Tree Triangle and Brown Trunk Rectangle in rows.
- Work the Five-Point Star in joined rounds.
- The right side of the tree is the side where the Spiral Garland will be attached.
- Leave every specified sewing tail untrimmed until the relevant assembly step is complete.
- For Tree Row 13, insert the hook into each of the 3 remaining stitches in turn and draw up a loop. Yarn over and draw through all 4 loops, joining 3 stitches into 1 stitch.
- The ornament is not stuffed.
Complete Free Crochet Pattern
Evergreen Tree Triangle — Make 1 in Evergreen
Before making the slip knot, leave a 24 in (61 cm) sewing tail. This tail will secure the lower edges and trunk during finishing.
Ch 26.
Row 1: Sc in second ch from hook and in each ch across; turn. (25 sc)
Row 2: Ch 1, sc2tog, sc in each st to final 2 sts, sc2tog; turn. (23 sc)
Row 3: Ch 1, sc2tog, sc in each st to final 2 sts, sc2tog; turn. (21 sc)
Row 4: Ch 1, sc2tog, sc in each st to final 2 sts, sc2tog; turn. (19 sc)
Row 5: Ch 1, sc2tog, sc in each st to final 2 sts, sc2tog; turn. (17 sc)
Row 6: Ch 1, sc2tog, sc in each st to final 2 sts, sc2tog; turn. (15 sc)
Row 7: Ch 1, sc2tog, sc in each st to final 2 sts, sc2tog; turn. (13 sc)
Row 8: Ch 1, sc2tog, sc in each st to final 2 sts, sc2tog; turn. (11 sc)
Row 9: Ch 1, sc2tog, sc in each st to final 2 sts, sc2tog; turn. (9 sc)
Row 10: Ch 1, sc2tog, sc in each st to final 2 sts, sc2tog; turn. (7 sc)
Row 11: Ch 1, sc2tog, sc in each st to final 2 sts, sc2tog; turn. (5 sc)
Row 12: Ch 1, sc2tog, sc, sc2tog; turn. (3 sc)
Row 13: Ch 1, join the remaining 3 sts into 1 as described in Important Pattern Notes. (1 st)
Fasten off, leaving a 12 in (30 cm) sewing tail at the point.
Brown Trunk Rectangle — Make 1 in Brown
Leave a 12 in (30 cm) sewing tail. Ch 6.
Row 1: Sc in second ch from hook and in each ch across; turn. (5 sc)
Rows 2–5: Ch 1, sc in each st across; turn. (5 sc)
Fasten off, leaving a second 12 in (30 cm) sewing tail.
Spiral Garland — Make 1 in Cream and Gold
With cream, leave a 12 in (30 cm) sewing tail and ch 36.
Row 1: Work 3 sc in second ch from hook and 3 sc in each remaining ch across. (105 sc)
The strip will coil naturally. Fasten off cream, leaving a 12 in (30 cm) tail.
Join gold with a sl st in the first sc at one end of the strip. Working loosely through the front loop only, sl st in each of the 105 sc across. (105 sl sts)
Fasten off gold, leaving a 12 in (30 cm) sewing tail. Gently twist the strip in its natural direction so the cream coils remain visible beside a narrow gold ridge.
Five-Point Star — Make 1 in Gold
Leave a 12 in (30 cm) sewing tail and make an MR.
Round 1: Ch 1, work 10 sc in MR, join with sl st to first sc. (10 sc)
Round 2: Rep the following point 5 times: sl st in next sc, ch 4, sl st in second ch from hook, sc in next ch, dc in next ch, sl st in next unworked sc. (5 points; all 10 Round 1 stitches used)
Fasten off, leaving a second 12 in (30 cm) sewing tail. Close the MR securely. Weave its starting tail through the backs of several Round 1 stitches, then trim that starting tail.
Hanging Loop — Make 1 in Gold
Leave a 10 in (25 cm) sewing tail and ch 24. Beginning in the first chain made, sl st loosely in each of the 24 chains to form a reinforced cord. Fasten off, leaving a second 10 in (25 cm) sewing tail. Do not join the ends yet.
Assembly
- Lightly block the Evergreen Tree Triangle and Brown Trunk Rectangle to the stated measurements. Do not stretch the Spiral Garland or Hanging Loop. Let all components dry completely.
- Place the trunk behind the lower center of the tree. Leave 3 trunk rows visible below the tree and overlap 2 trunk rows behind it. Using both brown tails, whipstitch the overlapping rows securely to the tree back. Knot the tails together on the back, weave them through the trunk, and trim.
- Place the tree right side up. Arrange the garland in three descending curved swags: a short curve across Tree Rows 9–11, a medium curve across Rows 5–8, and the longest curve across Rows 1–4. Preserve the corkscrew texture rather than flattening every coil. Keep every garland section at least one stitch inside the tree edges.
- Use the cream starting and ending tails to anchor the two outer garland ends to the tree back. Use the gold tails to tack the garland invisibly at the center of each swag and at every change of direction. Pass each tack through the tree fabric and one inner garland loop. Add small tacks with a matching scrap of gold yarn wherever necessary so no unsecured span exceeds 1 in (2.5 cm). Knot the ends on the back, weave through several tree stitches, and trim.
- Center the star over the tree point, with its lower point overlapping the tree top by approximately 0.5 in (1.25 cm). Use one star tail to sew around the lower point and along the adjacent inner edges of the two side points. Leave the upper point free. Knot securely on the back, weave in, and trim. Retain the other star tail for attaching the Hanging Loop.
- Bring the two hanging-cord ends together without twisting the loop. Position both ends vertically against the back of the tree point, extending them downward by 1 in (2.5 cm). Use both loop tails to sew each end through the tree point and star back at least three times. Tie the two tails together with a square knot. Use the retained star tail to make three additional stitches through both cord ends and the tree, then knot it to one loop tail. Weave all tails in opposite directions through the backs of the tree stitches and trim.
Finishing
- Use the tree’s long lower tail to make small securing stitches along any curling lower corners and around the trunk junction if required.
- Use the tree-point tail to reinforce the star-and-loop junction without sewing through the free upper star point.
- Weave in all remaining tails securely.
- Shape the three garland swags and all five star points with your fingers.
- Check that the trunk, star, garland, and both hanging-loop ends are firmly attached before hanging the ornament.
Customization Ideas
Change the color palette without altering the construction or stitch counts. Try icy blue with silver, white with rose gold, or a traditional deep green with bright gold. Variegated yarn can be used for the tree if it matches the same worsted weight. For a subtler garland, choose two closely related shades; for stronger contrast, pair cream with a vivid metallic gold. Avoid adding heavy decorations that could distort the flat tree or strain its yarn-only hanging loop.
Common Mistakes to Avoid
- Counting the turning chain: The ch 1 at the start of a row does not count as a stitch.
- Missing an edge decrease: Tree Rows 2–12 each decrease once at both ends, reducing the count by 2 per row.
- Working into too few garland chains: Ch 36 creates 35 chains to work into, producing 105 sc when each receives 3 sc.
- Flattening the garland: Tack through inner loops while preserving its corkscrew texture.
- Using the same star stitch twice: Each star point consumes 2 previously unworked Round 1 stitches.
- Twisting the Hanging Loop: Align both cord ends before sewing them to the back.
- Trimming tails too soon: Keep all specified sewing tails until their assembly jobs are complete.
Troubleshooting
Why does my tree lean to one side?
Check that every decrease row begins and ends with one sc2tog. Count after each row: the sequence must be 25, 23, 21, 19, 17, 15, 13, 11, 9, 7, 5, 3, and 1.
Why is the garland not curling?
Confirm that you worked 3 sc into each of the 35 available foundation chains. The dense increase rate creates the spiral. Gently turn the completed strip in its natural direction rather than forcing it backward.
Why does the gold ridge make the garland stiff?
Work the 105 gold slip stitches loosely through the front loops only. Tight slip stitches can compress the spiral.
Why does my star have fewer than five points?
Each point uses 2 base stitches: the first receives the initial sl st and the next unworked stitch receives the closing sl st. Five repetitions consume all 10 stitches from Round 1.
Why does the ornament tip forward?
Ensure the two loop ends are centered vertically on the back and extend downward by the same 1 in (2.5 cm). Reinforce both ends evenly through the tree point and star back.
Care Instructions
Follow the washing guidance on the yarn labels. For the safest routine, spot-clean with cool water and mild detergent, blot without wringing, reshape the tree, garland swags, and star points, and dry flat. Store flat in a dry container so the ornament is not crushed. Before each use, inspect the yarn-only hanging loop and its attachment stitches.
Frequently Asked Questions
Is this pattern written in US terms?
Yes. All stitch names and abbreviations use US crochet terminology.
Does the ornament need stuffing?
No. It is a flat ornament, and no stuffing is used.
Does it require wire, beads, buttons, or a metal hook?
No. The crocheted gold cord is the only hanging attachment, and no separate hardware is required.
Can I use a different yarn weight?
You can, but the finished dimensions and firmness will change. Use the same yarn weight for every component so the proportions remain consistent, and choose a suitable hook.
How are the three garland swags positioned?
Place the short swag across Tree Rows 9–11, the medium swag across Rows 5–8, and the longest swag across Rows 1–4, keeping the garland at least one stitch inside both edges.
How many stitches should the Spiral Garland contain?
Its cream row contains 105 sc: 35 workable foundation chains multiplied by 3 sc per chain. The gold edging contains 105 sl sts.
How can I make the hanging attachment secure?
Sew each cord end through the tree point and star back at least three times, tie the loop tails together, and then add three more stitches through both ends and the tree with the retained star tail.