
Spiral Crochet Christmas Tree Ornament
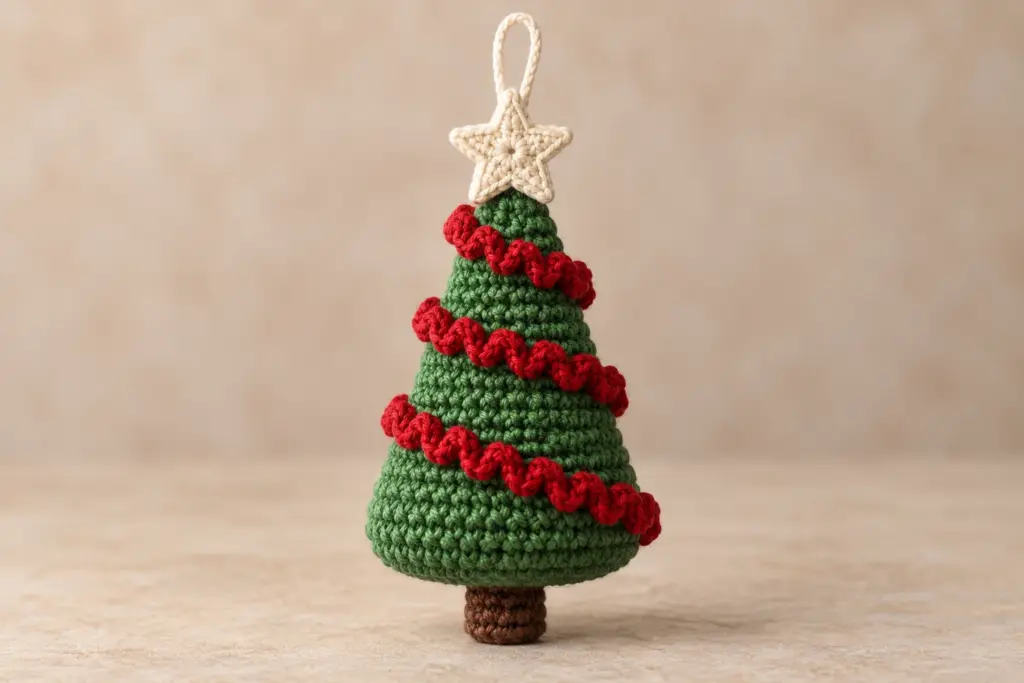
Add handmade color to your holiday decorations with this free Spiral Crochet Christmas Tree Ornament pattern. The design combines a softly stuffed green cone, a doubled brown trunk, a cream five-point star, a bright red corkscrew garland, and a secure crocheted hanging loop. Its compact size makes it suitable for a Christmas tree, garland display, gift topper, or seasonal keepsake.
This original design is written in US crochet terminology. The tree body is worked from the tip downward in continuous rounds, while the remaining pieces are crocheted separately and securely sewn in place.
Pattern at a Glance
- Skill level: Easy/intermediate
- Terminology: US crochet terms
- Construction: A stuffed cone worked in continuous rounds with separately crocheted trunk, star, spiral garland, and hanging loop
- Visible crocheted components: 1 green stuffed cone-shaped tree body, 1 brown crocheted trunk, 1 cream five-point crocheted star topper, 1 red corkscrew spiral garland, and 1 cream crocheted hanging loop
- Primary techniques: Magic ring, continuous rounds, increases, turned rows, double crochet curls, sewing, stuffing, and finishing
Materials You’ll Need
- Worsted-weight category 4 yarn: 20 yd (18 m) green for the tree body
- Worsted-weight category 4 yarn: 8 yd (7.5 m) red for the spiral garland
- Worsted-weight category 4 yarn: 4 yd (3.5 m) brown for the trunk
- Worsted-weight category 4 yarn: 6 yd (5.5 m) cream for the star and hanging loop
- 3.5 mm (US E/4) crochet hook
- Removable stitch marker
- Yarn needle
- Scissors
- Approximately 0.2 oz (6 g) polyester fiberfill
No separate metal or plastic hardware is needed. The crocheted hanging loop is sewn directly through the stuffed body and star base.
Gauge
16 sc and 20 rounds = 4 in (10 cm) in continuous-round single crochet.
Exact gauge is not critical, but the fabric should be firm enough that the stuffing does not show through. If your stitches leave visible gaps, try a smaller hook.
Finished Measurements
Approximately 4 1/2 in (11.5 cm) tall from the trunk base to the star tip, excluding the hanging loop, and approximately 3 in (7.5 cm) across the tree base. The hanging loop adds approximately 2 1/2 in (6.5 cm) when laid flat.
Crochet Abbreviations
- ch: chain
- dc: double crochet
- hdc: half double crochet
- inc: work 2 sc in the indicated stitch
- rep: repeat
- rnd: round
- sc: single crochet
- sl st: slip stitch
- st(s): stitch(es)
Important Pattern Notes
- Work the Tree Body in continuous rounds unless instructed otherwise. Do not join its rounds.
- Place a marker in the first stitch of each body round and move it upward after every completed round.
- The beginning chain does not count as a stitch unless explicitly stated.
- Stitch counts for the Star Topper include its five ch-2 point spaces. The slip stitch used to close the round does not count as a stitch.
- Stuff the Tree Body lightly so its base can be flattened and its cone retains a crisp outline.
- The Spiral Garland will curl naturally. Its tightness and finished length can vary slightly with yarn twist and personal tension, so arrange all four turns evenly before sewing.
Complete Free Crochet Pattern
Component 1 — Tree Body
Color: Green
Quantity: 1
Begin at the top of the cone.
Rnd 1: Make a magic ring. Work 6 sc into ring. Pull ring closed. (6 sts)
Rnd 2: Sc in each st around. (6 sts)
Rnd 3: Inc in each st around. (12 sts)
Rnd 4: Sc in each st around. (12 sts)
Rnd 5: [Sc in next st, inc in next st] 6 times. (18 sts)
Rnd 6: Sc in each st around. (18 sts)
Rnd 7: [Sc in next 2 sts, inc in next st] 6 times. (24 sts)
Rnd 8: Sc in each st around. (24 sts)
Rnd 9: [Sc in next 3 sts, inc in next st] 6 times. (30 sts)
Rnd 10: Sc in each st around. (30 sts)
Rnd 11: [Sc in next 4 sts, inc in next st] 6 times. (36 sts)
Rnds 12–13: Sc in each st around. (36 sts in each rnd)
After Rnd 13, sl st in the next st. Fasten off, leaving a 30 in (76 cm) sewing tail. Lightly stuff the cone, filling the tip first and keeping the lower opening circular. Do not close the base yet.
Component 2 — Trunk
Color: Brown
Quantity: 1
Work in turned rows.
Ch 7.
Row 1: Sc in second ch from hook and in each remaining ch. Turn. (6 sts)
Rows 2–5: Ch 1, sc in each st across. Turn. (6 sts in each row)
Fasten off, leaving a 16 in (41 cm) sewing tail. Fold the rectangle in half so Row 1 meets Row 5, creating a doubled piece approximately 1 1/2 in (4 cm) wide by 1/2 in (1.25 cm) tall. Use the tail to whipstitch Row 1 to Row 5 through corresponding stitches. Leave both short side edges unsewn; they will be enclosed at the tree base.
Component 3 — Star Topper
Color: Cream
Quantity: 1
Rnd 1: Make a magic ring. [Sc in ring, hdc in ring, dc in ring, ch 2, dc in ring, hdc in ring, sc in ring] 5 times. Pull the ring closed and sl st to the first sc. Each ch-2 space forms one point. (30 worked sts and 5 ch-2 spaces; 35 positions total)
The closing sl st is not counted as a stitch. Fasten off, leaving a 14 in (36 cm) sewing tail. Block gently by pinching each ch-2 space outward. The star is a single-layer decorative piece and is not stuffed.
Component 4 — Spiral Garland
Color: Red
Quantity: 1
Ch 55.
Row 1: Work 3 dc in second ch from hook and 3 dc in each remaining ch. (162 dc)
The fabric will curl naturally into a corkscrew. Fasten off, leaving a 14 in (36 cm) tail at both ends. If the starting tail is shorter, attach a separate red sewing strand at that end.
Component 5 — Hanging Loop
Color: Cream
Quantity: 1
Leaving an 8 in (20 cm) starting tail, ch 24. Without twisting the chain, sl st in the first ch to form a loop. Fasten off, leaving an 8 in (20 cm) ending tail. Knot the two tails together securely at the base of the loop, leaving both tails available for sewing.
Assembly and Finishing
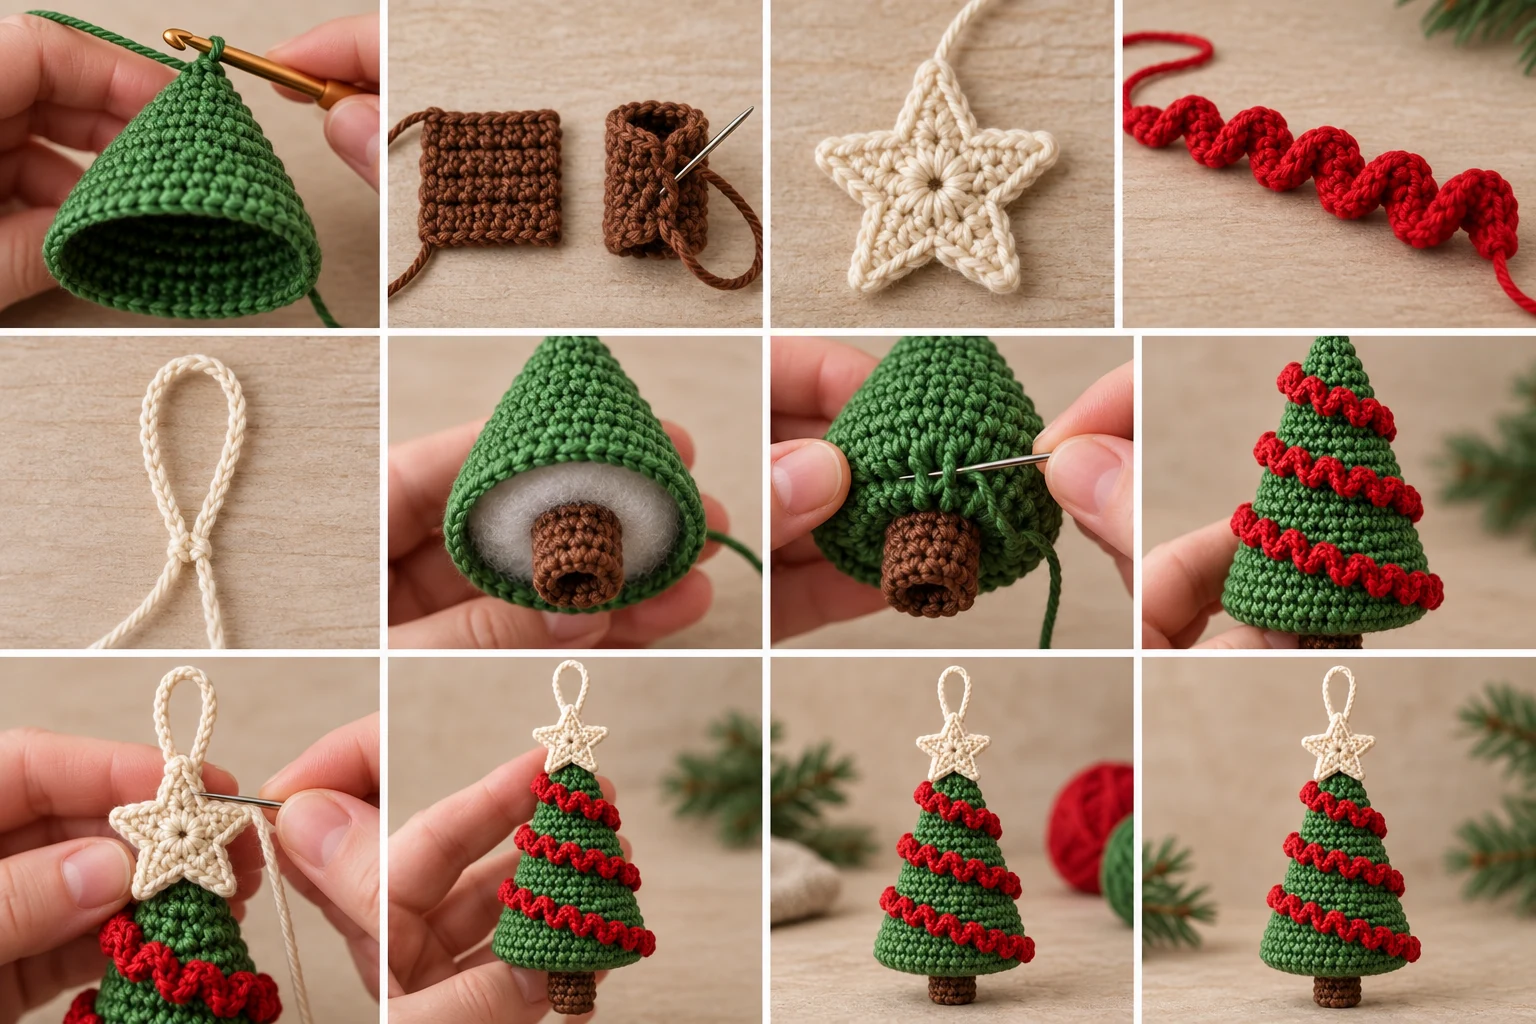
- Position the Trunk: Place the folded Trunk inside the Tree Body opening, centered beneath the cone, with approximately 1/2 in (1.25 cm) extending below the green edge. Face the joined long edges of the Trunk toward the back. Pin or hold it in position.
- Adjust the stuffing: Add or remove fiberfill until the Tree Body is lightly and evenly stuffed. Keep the stuffing at least 1/4 in (6 mm) away from the open edge so it cannot become caught in the closing seam.
- Close the base: Thread the long green Tree Body tail. Flatten the final round so 18 front stitches align with 18 back stitches. Whipstitch through one front stitch and its corresponding back stitch across the base. Enclose both upper short edges of the Trunk within the center four seam pairs. Pass through those trunk layers twice for reinforcement. The 36 body stitches form exactly 18 matched seam pairs. Secure the yarn inside the body and weave in the end.
- Attach the Spiral Garland: Position the lower red end on the right side of the Trunk, directly above the base seam. Coil the garland counterclockwise around the cone in four evenly spaced rising turns, ending approximately 1/2 in (1.25 cm) below the cone tip. Keep the corkscrew ruffles facing outward. Use each long red end and, where needed, short separate red sewing strands to tack the garland at its lower end, upper end, and at least eight evenly distributed points between them. Pass each tack through the garland’s base chain and one green body stitch without crushing the ruffle. Knot securely inside the body surface and weave in all red ends.
- Attach the Star Topper: Center the cream Star Topper over the cone tip with its magic-ring center against the tip and one point facing straight upward. Using the star’s cream tail, sew around the magic-ring center and into the top two rounds of the green cone. Make at least six small stitches distributed around the center, then pass through the attachment twice more for reinforcement. Leave all five points free. Secure the tail and weave it into the tree.
- Attach the Hanging Loop: Place the knotted base of the loop behind the upper star point. Thread both loop tails together through the star near the base of that point and through the top of the stuffed green cone. Separate the tails, bring each one back through a different nearby stitch, and tie a tight square knot against the back of the star. Sew once more through the star and cone with each tail, then weave the tails in separately. Tug firmly on the loop to confirm that the attachment does not shift.
- Final shaping: Weave in every remaining end. Shape the cone, straighten the Trunk, spread the five star points, and distribute the red Spiral Garland into four balanced turns. No external hardware is required.
Stitch-Count Check
- Tree Body Rnd 1: 6 sc in the magic ring = 6 sts.
- Tree Body Rnd 2: 6 existing sts worked evenly = 6 sts.
- Tree Body Rnd 3: 6 increases × 2 sts = 12 sts.
- Tree Body Rnd 4: 12 existing sts worked evenly = 12 sts.
- Tree Body Rnd 5: 6 repeats × 3 sts = 18 sts.
- Tree Body Rnd 6: 18 existing sts worked evenly = 18 sts.
- Tree Body Rnd 7: 6 repeats × 4 sts = 24 sts.
- Tree Body Rnd 8: 24 existing sts worked evenly = 24 sts.
- Tree Body Rnd 9: 6 repeats × 5 sts = 30 sts.
- Tree Body Rnd 10: 30 existing sts worked evenly = 30 sts.
- Tree Body Rnd 11: 6 repeats × 6 sts = 36 sts.
- Tree Body Rnds 12–13: 36 existing sts worked evenly = 36 sts in each round.
- Trunk: Ch 7 provides 6 working chains; each of the 5 rows contains 6 sc.
- Star Topper: 5 repeats produce 30 worked stitches and 5 ch-2 spaces, for 35 counted positions. The closing sl st is not counted.
- Spiral Garland: Ch 55 provides 54 working chains; 54 × 3 dc = 162 dc.
- Hanging Loop: 24 chains joined end to end form one 24-chain loop.
Customization Ideas
Personalize the ornament without altering its construction by choosing a different four-color palette. Deep green, burgundy, gold, and ivory create a traditional look, while pale green, pink, white, and tan feel softer and more modern. Keep all yarns in the same worsted-weight category so the separately made components remain proportionate.
You can also vary the visual arrangement of the existing red garland slightly while retaining four balanced turns. Avoid stretching it tightly, because that can distort the stuffed cone or flatten the corkscrew texture.
Common Mistakes to Avoid
- Losing the start of a body round: Move the stitch marker after every round because the Tree Body is not joined.
- Counting the Star Topper incorrectly: Count 30 worked stitches and five ch-2 spaces. Do not count the closing sl st.
- Overstuffing the cone: Too much filling can widen the base, expose stuffing, and make the 18-pair closing seam difficult to align.
- Twisting the Hanging Loop: Lay the chain flat before joining it to the first chain.
- Flattening the garland: Sew through its base chain rather than compressing the decorative dc ruffles.
- Attaching the star by its points: Secure the center only and leave all five points free.
Troubleshooting
Why is my tree leaning?
Check that the cone is evenly stuffed and that the Trunk is centered within the four reinforced center seam pairs. Reshape the filling gently before tightening any remaining attachment stitches.
Why does the stuffing show?
Your tension may be too loose for the hook and yarn combination. Use a smaller hook for a firmer fabric, and avoid forcing excess fiberfill into the cone.
Why is the Spiral Garland not curling?
Confirm that you worked 3 dc into each of the 54 working chains. Gently twist the completed strip in its natural curling direction before positioning it in four turns.
Why will the garland not reach four balanced turns?
Do not pull it straight or stretch it tightly. Loosen the spacing between turns and arrange its natural corkscrew evenly from just above the base seam to approximately 1/2 in (1.25 cm) below the tip. Yarn twist and tension can cause small variations.
Why does the star look uneven?
Verify that all five repeats contain sc, hdc, dc, ch 2, dc, hdc, sc in that order. Pinch each ch-2 space outward and gently shape the five points before attaching the center.
Why does the hanging loop move?
Make sure its knotted base sits behind the upper star point and that both tails pass through the star and the top of the stuffed cone. Separate the tails, return them through different stitches, tie the square knot tightly, and complete the additional reinforcing pass with each tail.
Care Instructions
Gently spot-clean the ornament with cool water and mild detergent. Press it in a towel to remove moisture without wringing, reshape the cone, trunk, star points, and garland, and allow it to air-dry flat. Store it uncompressed in a dry container so the star and corkscrew ruffles retain their shape.
Frequently Asked Questions
Is this pattern written in US or UK crochet terms?
It uses US crochet terminology throughout.
Can a beginner make this ornament?
An adventurous beginner who is comfortable with magic rings, increases, continuous rounds, and basic sewing can complete it. The garland and reinforced assembly make the project best suited to an easy/intermediate skill level.
Is the star stuffed?
No. The Star Topper is a single-layer decorative piece. Its center is sewn to the cone while all five points remain free.
How many turns should the garland make?
Arrange it in four evenly spaced, counterclockwise rising turns.
Does the ornament require a metal hanger?
No. The cream 24-chain Hanging Loop is reinforced through both the Star Topper and stuffed Tree Body, so no external hardware is needed.
Why is the tree base sewn flat?
Flattening the 36-stitch opening creates 18 matched seam pairs. This closes the stuffed cone cleanly and encloses the upper edges of the Trunk in the center of the seam.
Can I use a different yarn weight?
A different yarn weight will change the size and may alter the fit between components. For the stated measurements and proportions, use worsted-weight category 4 yarn for every component.
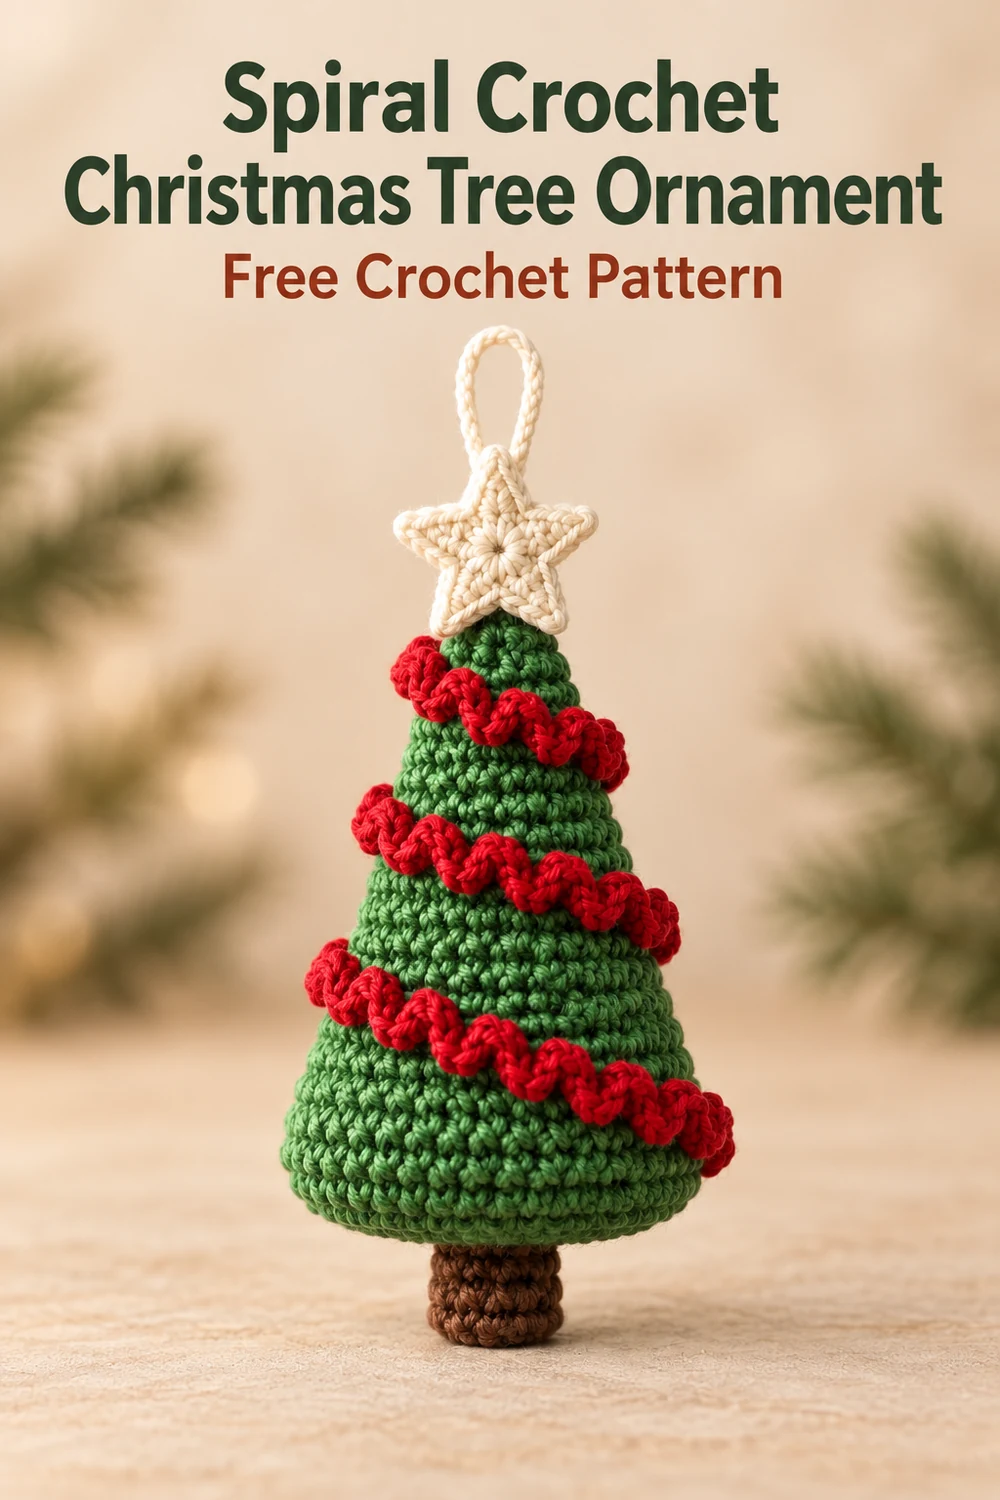
This Spiral Crochet Christmas Tree Ornament is ready to hang once every end is woven in, the loop passes a firm tug test, and the five star points and four garland turns have been evenly shaped.