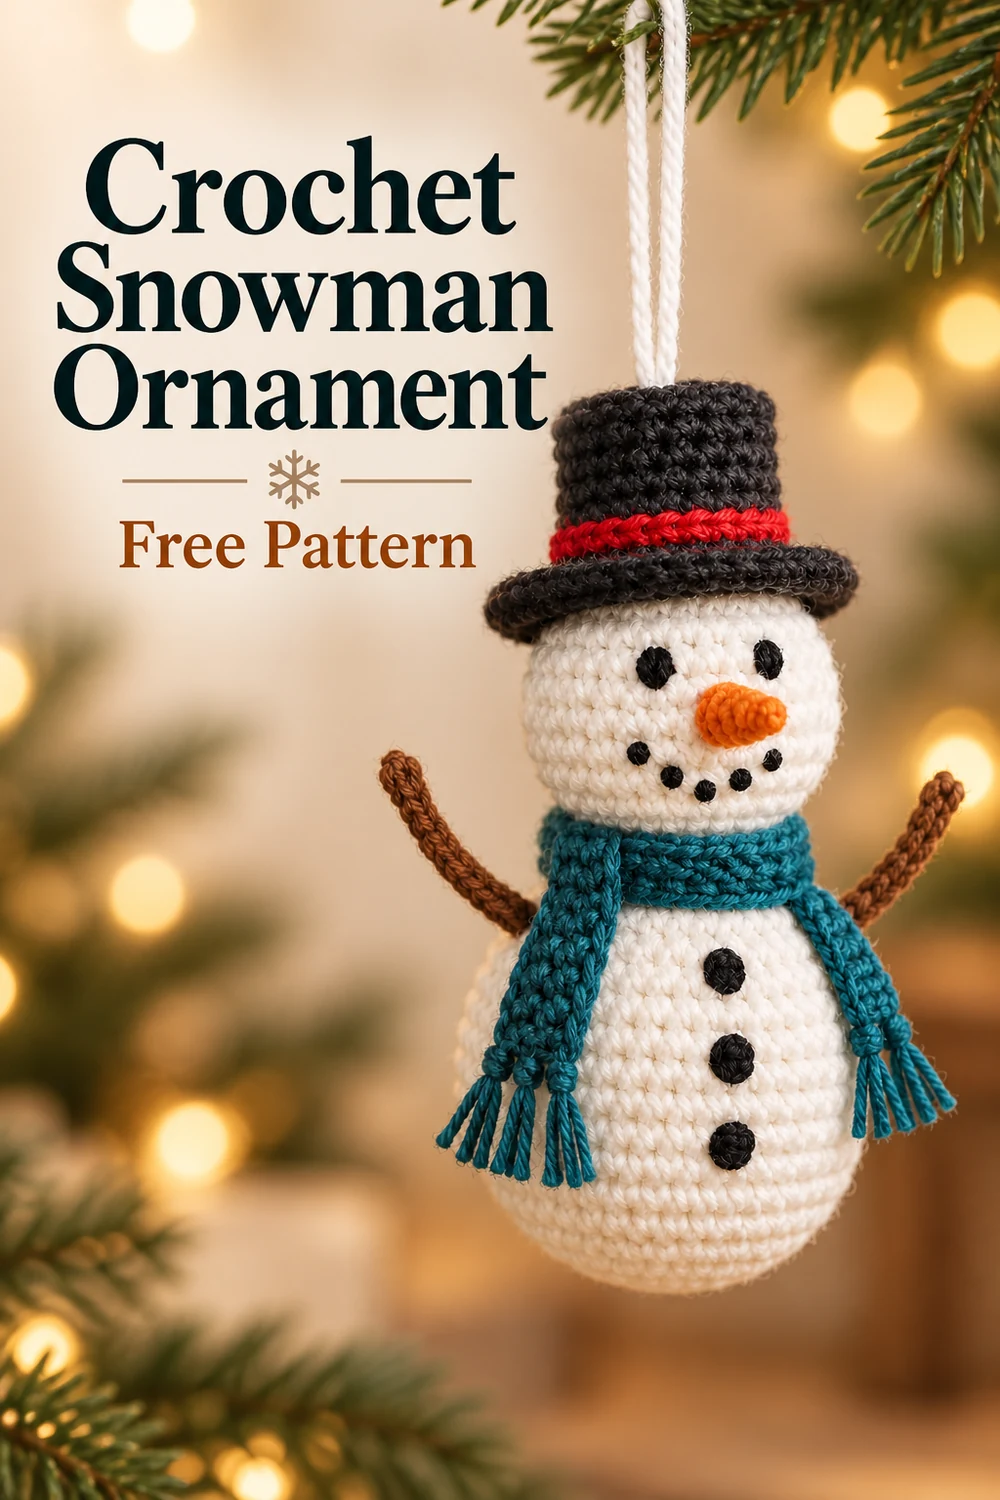
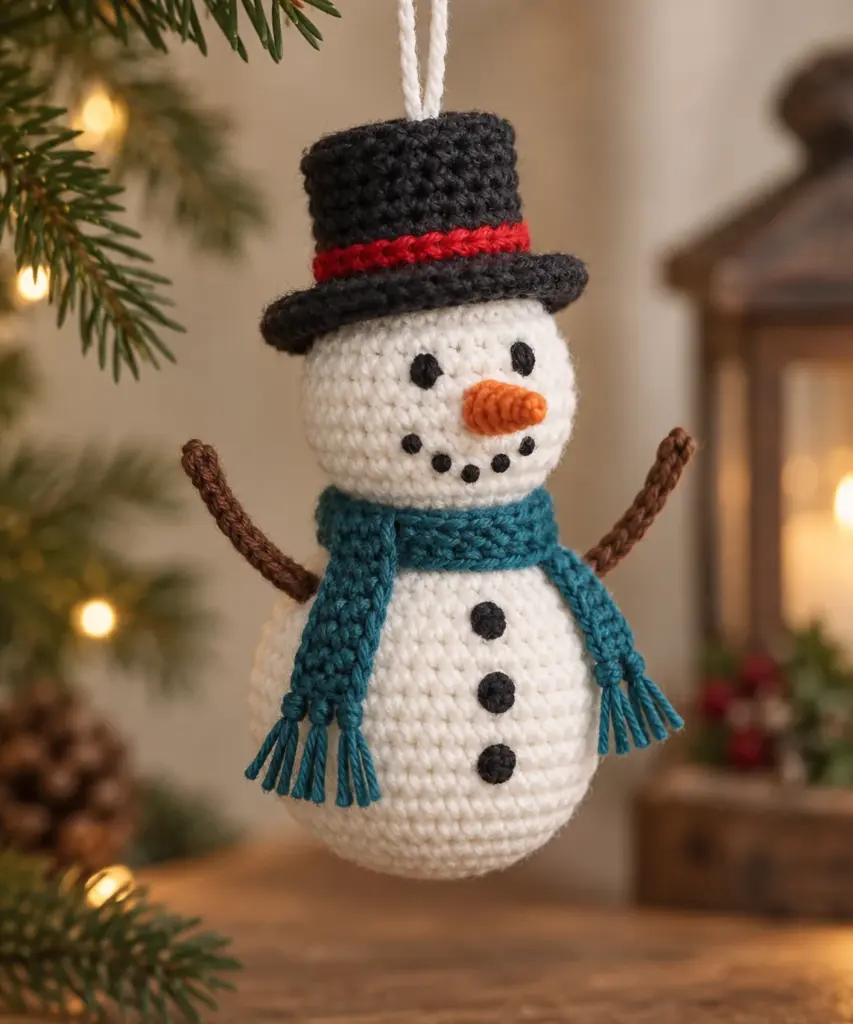
Crochet Christmas Snowman Hanging Ornament Pattern
Bring a little handmade cheer to your tree with this free crochet snowman ornament pattern. The original design combines two softly stuffed snow-white spheres with a flared top hat, winter-teal scarf, dimensional carrot nose, simple twig arms, embroidered features, and a secure crocheted hanging loop.
The complete pattern uses US crochet terminology and includes every visible crocheted component, exact stitch counts, detailed assembly instructions, finishing guidance, customization ideas, troubleshooting tips, and care information.
Pattern at a Glance
- Skill level: Advanced beginner to intermediate
- Terminology: US crochet terms
- Construction: Separate stuffed body and head, integrated-brim hat, flat scarf, small nose, chain-stitch arms, and chain hanging loop
- Primary techniques: Magic ring, continuous rounds, single crochet, increases, invisible decreases, back-loop-only crochet, surface slip stitches, simple embroidery, stuffing, and sewing
- Finished size: Approximately 6 in (15 cm) tall, excluding the hanging loop
- Yarn weight: Worsted weight, category 4
- Hook: 3.5 mm (US E/4)
Visible Component Inventory
This ornament contains 1 lower body sphere in snow white, 1 head sphere in snow white, 1 charcoal-black top hat with an integrated brim and holly-red band, 1 winter-teal scarf, 1 pumpkin-orange carrot nose, 2 cocoa-brown twig arms, and 1 snow-white hanging loop. Its details include 2 embroidered eyes, 5 embroidered mouth dots, 3 embroidered buttons, and 12 cut winter-teal fringe strands arranged as 6 bundles.
Materials You’ll Need
- Approximately 45 yd (41 m) worsted-weight category 4 acrylic or cotton yarn in snow white
- Approximately 18 yd (16.5 m) in charcoal black
- Approximately 12 yd (11 m) in winter teal
- Approximately 3 yd (2.75 m) in pumpkin orange
- Approximately 3 yd (2.75 m) in cocoa brown
- Approximately 2 yd (1.8 m) in holly red
- 3.5 mm (US E/4) crochet hook
- Locking stitch marker
- Yarn needle
- Scissors
- Polyester fiberfill
- Optional straight pins for positioning
Choose smooth, firmly plied yarns of similar weight. This design uses embroidered features and requires no safety eyes, metal fittings, or plastic hardware.
Gauge
20 sc and 22 rounds = 4 in (10 cm) in continuous-round single crochet, measured before stuffing.
Exact gauge is not critical, but the fabric must be dense enough to contain the fiberfill. If stuffing shows through the stitches, use a smaller hook. If the fabric is excessively stiff or difficult to work, try a slightly larger hook while preserving a closed fabric.
Finished Measurements
- Approximately 6 in (15 cm) from the bottom of the body to the top of the hat, excluding the hanging loop
- Approximately 3.25 in (8.5 cm) across the body
- Hanging loop approximately 3.5 in (9 cm) long when laid flat
Measurements may vary with yarn, tension, and stuffing density.
Crochet Abbreviations
- ch = chain
- sl st = slip stitch
- sc = single crochet
- inc = 2 sc in the indicated stitch
- inv dec = invisible single crochet decrease over the next 2 stitches
- BLO = back loop only
- st(s) = stitch(es)
- R = round
- Row = row
- rep = repeat
- FO = fasten off
- MR = adjustable magic ring
Important Pattern Notes
- Unless otherwise stated, amigurumi pieces are worked in continuous spirals without joining.
- Mark the first stitch and move the marker after every round.
- Numbers in parentheses are completed stitch counts.
- Turning chains do not count as stitches.
- Stuff firmly enough to hold each shape without stretching the crocheted fabric.
- Read through the complete assembly section before fastening off components with sewing tails.
- The lower body’s closing tail is secured inside and is not used for assembly. The head has a separate retained sewing tail for joining the two spheres.
- Surface crochet creates the hat band without changing the hat’s structural stitch count.
Complete Free Crochet Pattern
Lower Body — Make 1 in Snow White
Work in continuous rounds.
R1: Make 6 sc in MR. (6)
R2: Inc in each st around. (12)
R3: [Sc in next st, inc in next st] 6 times. (18)
R4: [Sc in next 2 sts, inc in next st] 6 times. (24)
R5: [Sc in next 3 sts, inc in next st] 6 times. (30)
R6: [Sc in next 4 sts, inc in next st] 6 times. (36)
R7–R11: Sc in each st around. (36 each round)
R12: [Sc in next 4 sts, inv dec] 6 times. (30)
R13: [Sc in next 3 sts, inv dec] 6 times. (24)
R14: [Sc in next 2 sts, inv dec] 6 times. (18)
Begin stuffing and continue adding small amounts evenly.
R15: [Sc in next st, inv dec] 6 times. (12)
R16: Inv dec 6 times. (6)
FO, leaving an 8 in (20 cm) tail. Add final stuffing if needed. Thread the tail through the front loop of each remaining stitch, pull the opening closed, and secure the tail inside the piece. Do not reserve this tail for assembly.
Head — Make 1 in Snow White
Work in continuous rounds.
R1: Make 6 sc in MR. (6)
R2: Inc in each st around. (12)
R3: [Sc in next st, inc in next st] 6 times. (18)
R4: [Sc in next 2 sts, inc in next st] 6 times. (24)
R5: [Sc in next 3 sts, inc in next st] 6 times. (30)
R6–R9: Sc in each st around. (30 each round)
R10: [Sc in next 3 sts, inv dec] 6 times. (24)
R11: [Sc in next 2 sts, inv dec] 6 times. (18)
Stuff firmly, keeping the shape round.
R12: [Sc in next st, inv dec] 6 times. (12)
R13: Inv dec 6 times. (6)
FO, leaving a 24 in (61 cm) sewing tail. Add final stuffing. Thread the tail through the front loop of each remaining stitch and pull closed, retaining the remaining tail for joining the head to the body.
Top Hat with Integrated Brim — Make 1 in Charcoal Black
Work in continuous rounds from the crown downward.
R1: Make 6 sc in MR. (6)
R2: Inc in each st around. (12)
R3: [Sc in next st, inc in next st] 6 times. (18)
R4: [Sc in next 2 sts, inc in next st] 6 times. (24)
R5: [Sc in next 3 sts, inc in next st] 6 times. (30)
R6: Working BLO, sc in each st around. (30)
R7–R10: Sc in each st around. (30 each round)
R11: [Sc in next st, inc in next st] 15 times. (45)
R12: Sc in each st around. (45)
Join with sl st in the next st. FO, leaving an 18 in (46 cm) tail for sewing the brim to the head.
Holly-Red Hat Band
Make a slip knot with holly-red yarn. Hold the hat upright with its crown at the top. Insert the hook around the post area of any stitch in R9 and draw up the red loop. Work 1 surface sl st around each of the 30 stitch positions of R9. Join the final surface sl st to the first. FO and weave both red ends securely into the hat. The band contains 30 surface slip stitches and does not alter the structural stitch count.
Scarf — Make 1 in Winter Teal
Ch 52.
Row 1: Sc in second ch from hook and in each remaining ch; turn. (51)
Rows 2–3: Ch 1, sc in each st across; turn. (51 each row)
At the end of Row 3, FO and weave in both tails.
Scarf Fringe
Cut 12 winter-teal strands, each 3 in (7.5 cm) long. For each of 6 bundles, hold 2 strands together, fold them in half, draw the fold through a scarf-end stitch, pass the loose ends through the fold, and tighten. Place 3 evenly spaced bundles on each short end. Trim the finished fringe evenly to approximately 1 in (2.5 cm).
Carrot Nose — Make 1 in Pumpkin Orange
Work in continuous rounds from the tip toward the base.
R1: Make 4 sc in MR. (4)
R2: Sc in each st around. (4)
R3: Inc in each st around. (8)
R4: Sc in each st around. (8)
FO, leaving a 12 in (30 cm) sewing tail. Do not stuff. Flatten the open base only enough to control it while sewing, keeping the cone projecting outward.
Twig Arms — Make 2 in Cocoa Brown
For each arm, ch 11. Starting in the second ch from the hook, sl st in each of the next 10 chains. (10 sl sts)
FO, leaving an 8 in (20 cm) tail at both the starting and finishing ends. Weave the starting tail back through the chain to secure the hand end. Retain the finishing tail for attaching the arm to the body.
Hanging Loop — Make 1 in Snow White
Leave an initial 8 in (20 cm) tail, then ch 30 loosely. Without twisting the chain, join the final chain to the first chain with a sl st to form a loop. FO, leaving a second 8 in (20 cm) tail. Knot the two tails together once immediately below the joined chain. Retain both tails for anchoring the loop through the hat and head.
Embroidery and Fringe
Use separate lengths of charcoal-black yarn and a yarn needle for the facial features and buttons. Secure each end by passing it through several interior stitches. Do not carry long exposed floats across the surface.
- Eyes: Make 2 compact satin-stitch or French-knot eyes on the head between R6 and R7, approximately 6 stitches apart.
- Mouth: Make 5 small straight-stitch dots in a shallow smile spanning approximately 7 stitches between R8 and R9.
- Buttons: Make 3 compact satin-stitch or French-knot buttons centered vertically on the body over R7, R9, and R11.
- Fringe: Use the 12 cut winter-teal strands to make the 6 two-strand bundles described in the scarf instructions.
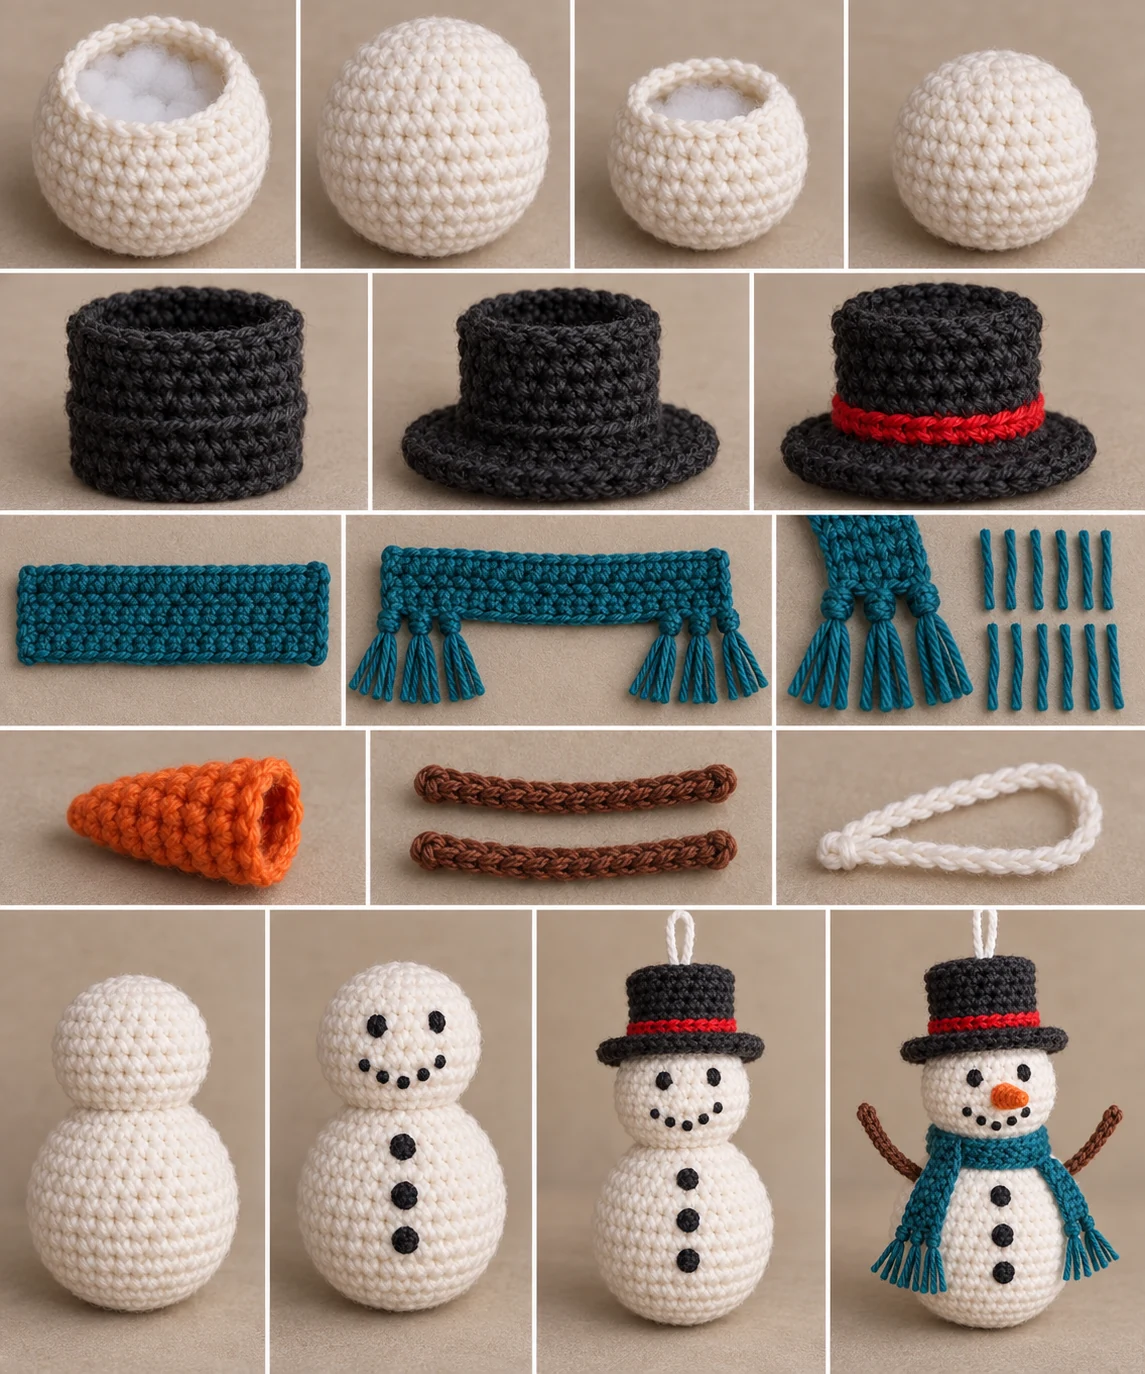
Assembly and Finishing
- Join the head and lower body. Identify the front of both stuffed white pieces. Thread the retained head tail onto the yarn needle. Center the closed R13 end of the head over the closed R16 end of the body. Sew through sturdy stitches approximately one round out from each closure, making small stitches around the entire contact area. Pass around twice if needed. Pull the seam snug without flattening either sphere, knot securely, and bury the tail inside the body.
- Embroider the face. Add the 2 eyes and 5 mouth dots in the specified positions. Bury all knots and tails inside the head.
- Attach the carrot nose. Center its open base between the eyes and mouth, approximately over R7–R8 of the head. With the orange tail, whipstitch each of the 8 base stitches to the head. Make a second pass around the base so the nose cannot rotate. Knot securely and bury the tail.
- Attach the twig arms. Position one arm on each side of the body, with the inner end at approximately R7 and the arm angled slightly upward. Use each finishing tail to sew through the final chain section and body three times. Knot and bury the tail. Confirm that both hand-end starting tails have been woven through their chains.
- Attach the top hat. Center the hat on the head with its brim just above the eyes. Use the 18 in (46 cm) black tail to tack the brim to the head at 8 evenly spaced points. At every point, pass through one brim stitch and a secure head stitch twice. Keep the brim flat, knot securely, and bury the tail.
- Anchor the hanging loop. Feed both loop tails down through the center of the hat crown, through the hat cavity, and into the top center of the head. Hold the loop upright. Separate the tails inside the head fabric and bring them out approximately 1 in (2.5 cm) apart beneath the rear half of the brim. Tie a secure square knot against the head surface, stitch each tail back through the head twice, and bury the ends. Tack the knot beneath the brim so it remains concealed. Tug firmly on the loop to confirm that it does not shift.
- Add the scarf. Wrap it once around the neck seam. Cross the ends at the front-right side and tie one loose overhand knot. Alternatively, overlap the ends and use a matching winter-teal yarn scrap to sew through both layers with three small passes; knot securely on the underside and bury the ends. Arrange all 6 fringe bundles visibly.
- Add the buttons. Embroider 3 charcoal-black buttons in the specified positions over body R7, R9, and R11. Bury every end.
Final Finishing Check
Roll the body and head gently between your palms to refine their shapes. Straighten the hat brim, scarf, fringe, nose, and arms. Check that the head seam, nose, arms, hat, scarf, and hanging loop are secure. Confirm that no yarn tails remain exposed.
This ornament uses embroidered features instead of detachable eyes. It is a decorative item and is not intended as a toy. Keep it away from open flames and hang it where children or pets cannot pull on the loop or fringe.
Customization Ideas
You can personalize the ornament without changing its construction or stitch counts:
- Replace winter teal, holly red, or charcoal black with colors that coordinate with your holiday décor.
- Use a gently variegated yarn for the 51-stitch scarf while keeping the remaining pieces solid.
- Embroider the eyes and mouth in dark brown for a softer expression.
- Adjust the placement of the five mouth dots slightly to create a wider or subtler smile while keeping all five dots.
- Add a name or year to a separate gift tag attached beside the ornament rather than adding weight to the crocheted figure.
If substituting yarn, keep every color in the same weight and use a hook that produces firm, stuffing-safe fabric. A different yarn thickness will change the finished measurements.
Common Mistakes to Avoid
- Losing the first stitch: Move the marker after every continuous round so increases and decreases remain aligned.
- Miscounting an invisible decrease: Each inv dec uses 2 old stitches and produces 1 new stitch.
- Overstuffing: Excess fiberfill can stretch the fabric, expose gaps, and distort the spheres.
- Using the body’s closure tail for joining: Secure that tail inside the body. Use the head’s retained 24 in (61 cm) tail for the neck seam.
- Crocheting the hat band into structural stitches: The red band consists of 30 surface slip stitches around R9 and must not replace or add to a structural round.
- Twisting the hanging chain: Lay the 30-chain loop flat before joining its ends.
- Attaching the hat too early: Embroider the face and secure the nose first so their placement can be checked clearly.
- Leaving loose attachments: Follow the specified second pass around the nose, repeated arm stitches, 8 hat tacks, and reinforced loop anchor.
Troubleshooting
Why is my snowman leaning?
Check that both spheres are evenly stuffed and that the two closed ends are centered at the neck. Reinforce the seam with a second circuit through sturdy stitches about one round away from each closure.
Why is stuffing visible?
Your gauge may be too loose or the piece may be overstuffed. Use a smaller hook for a denser fabric and add fiberfill in small, even portions.
Why does the hat brim ripple?
Confirm R11 contains exactly 45 stitches and R12 contains 45 sc. When attaching the hat, distribute the 8 tacking points evenly and avoid pulling them so tightly that the brim buckles.
Why does the carrot nose point downward?
Keep its base centered over head R7–R8 and sew all 8 base stitches evenly. A second complete pass around the base prevents rotation.
Why does the hanging loop shift?
Make sure both tails pass through the hat crown and enter the head. Separate them by approximately 1 in (2.5 cm), tie a square knot against the head, stitch each tail through the head twice, and conceal the secured knot beneath the rear brim.
My scarf is a different length. Is that a problem?
The scarf should have 51 stitches in each of its 3 rows. If the count is correct, a modest length difference is normally caused by yarn choice or tension and can be acceptable if the scarf wraps comfortably around the neck.
Care Instructions
Gently spot-clean the ornament with cool water and a small amount of mild detergent. Blot rather than rub, reshape the spheres and accessories, and dry flat completely before storing or hanging. Avoid hot water, high heat, wringing, bleach, and direct contact with an iron. If the yarn manufacturer provides more restrictive care directions, follow those directions.
Store the ornament clean and fully dry in a breathable container. Avoid compressing the hat brim, carrot nose, or twig arms beneath heavier decorations.
Frequently Asked Questions
Is this crochet snowman ornament suitable for a beginner?
It is best for an advanced beginner comfortable with single crochet, continuous rounds, increases, invisible decreases, stuffing, embroidery, and sewing small pieces. The stitch patterns themselves are straightforward, but precise assembly matters.
Is the pattern written in US or UK terminology?
It uses US crochet terminology. In this pattern, sc means US single crochet.
Do I need safety eyes?
No. The two eyes, five mouth dots, and three buttons are embroidered with charcoal-black yarn. No detachable eyes or other hardware are used.
Should I stuff the carrot nose?
No. Leave the carrot nose unstuffed and keep its cone projecting outward while sewing its 8-stitch base to the head.
Can I make the ornament larger or smaller?
Yes. Use thicker or thinner yarn with a suitable hook while retaining every written stitch count. This changes the finished dimensions and yarn requirements, and the fabric must remain dense enough to hold stuffing.
Can I omit the hanging loop?
The loop is part of this hanging-ornament design. If the finished piece will only be displayed standing or resting, it may be left unattached, but it will no longer function as the specified hanging ornament.
How many fringe pieces are used?
Cut exactly 12 strands. Combine them in pairs to create 6 bundles, with 3 bundles attached to each short end of the scarf.
How can I check the explicit stitch counts?
The body increases from 6 to 36 stitches in multiples of 6 and decreases back to 6. The head and hat crowns increase from 6 to 30. The head decreases back to 6, while the hat expands from 30 to 45 stitches for its brim. The scarf begins with 52 chains and has 51 sc in each row because the first chain serves as the turning chain. Each twig arm begins with 11 chains and receives 10 slip stitches after the first chain is skipped.