
The first time you unfurl a bag of flour, the scent captures you—earthy and full of promise. You mix it with water, and the two come together in a sensory dance, a sticky embrace filled with potential. Soon, your kitchen fills with the aromatic whispers of fermentation, as wild yeasts awaken. As your sourdough starter matures, it becomes a living testament to your culinary journey, each bubbling inch reminding you of the secrets hidden within its tangy depths.
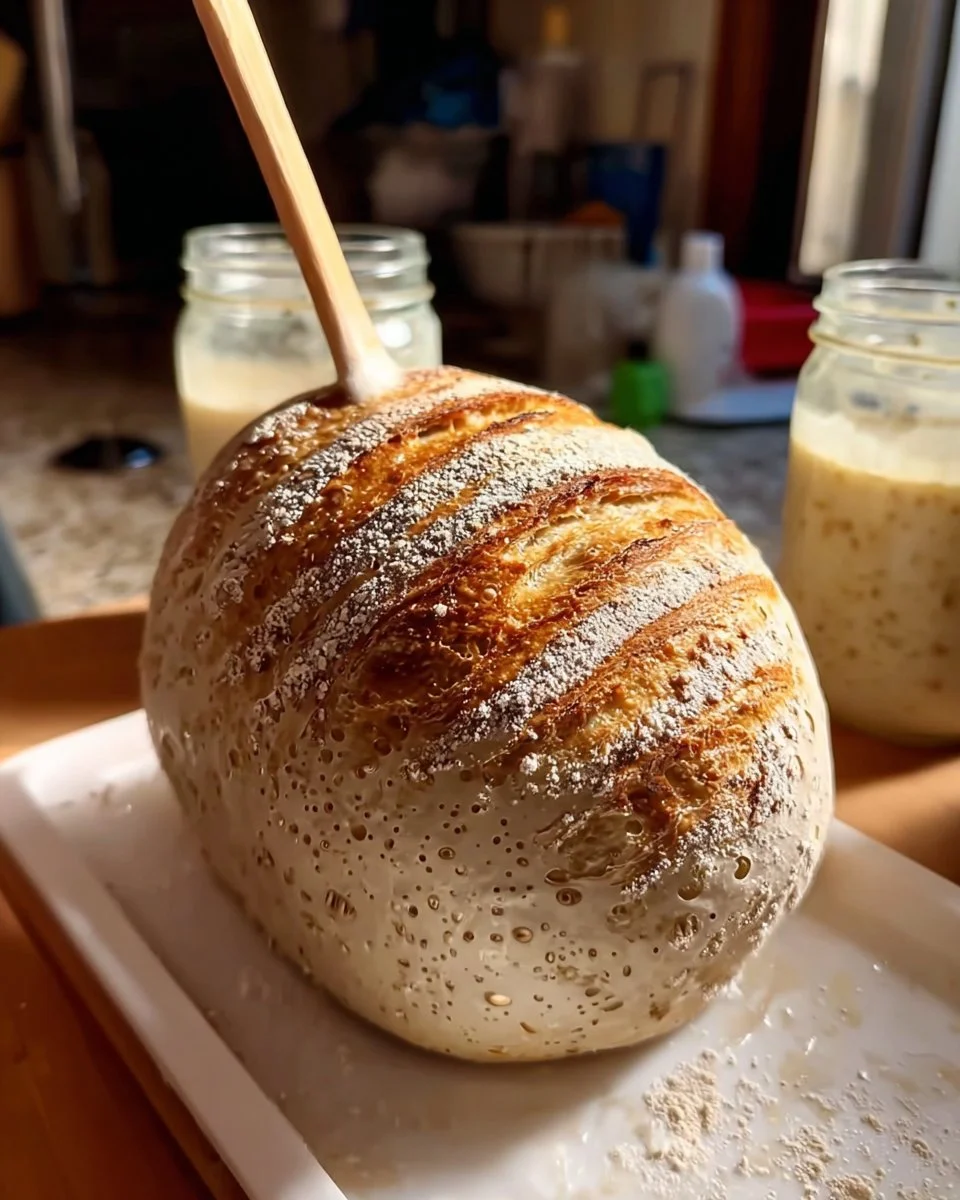
Imagine the thrill as you bake your first loaf: the crust crackling as it cools, each slice revealing a tender crumb speckled with air bubbles, and a delicate tang that captivates your taste buds. A pat of butter melts into the warm bread, sending forth an irresistible aroma that envelops your kitchen. The reward of your patience and perseverance fills your heart with warmth, a smile spreading across your face as you share this creation with loved ones.
Why You’ll Love This Sourdough Starter
Creating a sourdough starter opens the door to a world of delicious possibilities! This isn’t just about baking; it’s a process that invites you to engage with your food in a deeply fulfilling way. The satisfaction of nurturing your own starter is unparalleled. Each bubbling rise and delightful fragrance signal your success, encouraging you to keep feeding it, to keep watching it grow.
The rich, tangy flavor of bread made from your own starter surpasses anything you can buy in a store—a flavor that’s both complex and comforting. You’ll impress family and friends when you pull a loaf from the oven, its golden crust shimmering under the kitchen lights. Shared moments become richer when they’re accompanied by freshly baked bread, perfect for special occasions or a simple Tuesday evening.
Preparation Phase & Tools to Use
Embarking on this journey requires only a few essential tools, but each has its purpose.
- Glass Jar: You need a clean glass jar to hold your sourdough starter. Glass encourages fermentation and allows you to observe its progress.
- Kitchen Scale: Precision is key in baking, and a kitchen scale ensures you measure flour and water accurately, giving your starter the right balance.
- Spoon or Spatula: A sturdy spoon or spatula works well for stirring your starter and incorporating the ingredients fully.
- Cloth or Loose Lid: Covering the jar loosely allows air to flow while preventing unwanted contaminants from sneaking in.
Preparation tips elevate your sourdough starter-making experience. Always use filtered water to avoid chlorine, which can disrupt yeast development. Keep your kitchen warm; a cozy 70°F to 80°F (21°C to 27°C) becomes the perfect environment for blossoming yeast.
Ingredients for Sourdough Starter
- 100g Unbleached All-Purpose Flour: This sturdy flour provides the base for your starter. Consider using whole wheat or rye flour if you prefer a more robust flavor.
- 100g Filtered Room Temperature Water: The lifeblood of your starter, this water nourishes the flour and allows the yeast to thrive. Ensure it’s at room temperature for optimal results.
How to Make Sourdough Starter
-
In a clean glass jar, combine equal parts of flour and water—100g each. Stir until no dry lumps remain, and the mixture becomes thick and pasty.
-
Cover the jar loosely with a cloth or lid, allowing air to circulate while keeping out debris. This balance is essential for healthy fermentation.
-
Place the jar in a warm area, ideally between 70°F to 80°F (21°C to 27°C), and let it rest undisturbed for 24 hours. Resist the urge to peek!
-
Each day, feed your starter by adding equal parts flour and water (100g each), stirring vigorously until the mixture is well combined. This daily ritual feeds the growing yeast and bacteria.
-
Watch closely as, after several days, your starter begins to bubble and develop a pleasant sour aroma. This transformation astounds!
-
Once your starter doubles in size within 4 to 6 hours after feeding, it’s ready to use.
Chef’s Notes & Helpful Tips
- Make-Ahead Tips: If you can’t bake right away, store your starter in the fridge. Feed it once a week, and it will stay alive and well until you’re ready to bake.
- Cooking Alternatives: You can use your starter beyond bread-making! Try pancakes, waffles, or even muffins for a delightful twist.
- Customization Ideas: Experiment with different flours for unique flavors. Whole wheat will provide a nuttier essence, while rye enhances the tanginess of your starter.
Common Mistakes to Avoid
Creating a sourdough starter may be intimidating, but knowing the pitfalls can smooth the way. Avoid:
- Using chlorinated tap water, which can inhibit yeast growth. Always opt for filtered or bottled.
- Covering the jar too tightly. Your starter needs to breathe, so a loose cover is essential.
- Neglecting to feed it regularly. Skipping feedings can lead to a weak starter that struggles to rise.
What to Serve With Sourdough Starter
Your newly created sourdough starter opens a gateway to delightful dishes. Imagine these tasty pairings:
- Crusty Sourdough Bread: Perfect as the base for sandwiches or served warm with butter.
- Garlic Bread: Brush with herb-infused oil and bake for an aromatic treat.
- Savory Flatbreads: A quick way to showcase your starter alongside dips and spreads.
- French Toast: Use stale slices for an indulgent breakfast drizzled with maple syrup.
- Sourdough Pizza: Create a deliciously chewy crust topped with your favorite ingredients.
- Soups and Stews: Serve your fresh bread alongside hearty meals, providing the perfect vessel for dips.
- Bruschetta: Top toasted slices with fresh tomatoes, basil, and mozzarella for a refreshing appetizer.
- Fancy Crostini: Elevate snacks with smoked salmon or creamy goat cheese atop crispy sourdough rounds.
Storage & Reheating Instructions
Store your sourdough starter in the refrigerator if not using it daily. Ideally, it can last up to a week without a feeding. If you want to keep it longer, consider drying a portion or freezing it, which will extend its life for months. If you freeze it, rehydrate by following the feeding steps from the beginning.
Estimated Nutrition Information
The exact nutrition of your sourdough starter varies based on flour and water, but a rough estimate per serving (15g) is:
- Calories: 50
- Protein: 1.5g
- Total Fat: 0.2g
- Carbohydrates: 10g
- Fiber: 0.5g
Disclaimer: Nutritional values are approximate and will vary based on the specific ingredients used.
FAQs
Q1: How long does it take to develop a sourdough starter?
It typically takes 5 to 7 days for your sourdough starter to become fully active. During this time, it will change dramatically, bubbling and developing that signature smell.
Q2: Can I use regular flour instead of unbleached all-purpose flour?
Yes! You can use whole wheat flour, rye flour, or a mix of different flours to create a unique flavor profile for your starter.
Q3: What is the best way to feed my starter?
Remove half of your starter and add equal weights of flour and water to it. Stir thoroughly to combine and let it sit. Consistency in feeding is key!
Q4: What should I do if my starter smells bad?
A foul odor may indicate spoilage. If your starter smells like rotten or putrid, it’s best to discard it and start over. A healthy starter should smell tangy and pleasant.
Q5: How can I revive a neglected starter?
If you’ve left your starter in the fridge for a while, resume feedings gradually—feed it every 12 hours with equal parts flour and water until it becomes active again.
As you embark on this incredible journey of creating and nurturing your sourdough starter, you reveal the heart of home baking. The joy of watching it transform, bubbling and expanding, resonates through your kitchen and fills your heart with warmth. Soon, the aroma of freshly baked bread will dance in the air, filling your home with a comforting embrace. Dive into this rewarding process, and you will find a delightful new favorite, all beginning with a simple mixture of flour and water. Embrace the magic, and let your taste buds celebrate the wonder of sourdough!
Print
Sourdough Starter
- Prep Time: 15 minutes
- Cook Time: 7 days
- Total Time: 7 days
- Yield: 1 sourdough starter 1x
- Category: Baking
- Method: Fermenting
- Cuisine: American
- Diet: Vegetarian
Description
A beginner’s guide to creating your own sourdough starter, unlocking the full potential of homemade bread.
Ingredients
- 100g Unbleached All-Purpose Flour
- 100g Filtered Room Temperature Water
Instructions
- In a clean glass jar, combine equal parts of flour and water—100g each. Stir until no dry lumps remain, and the mixture becomes thick and pasty.
- Cover the jar loosely with a cloth or lid, allowing air to circulate while keeping out debris.
- Place the jar in a warm area, ideally between 70°F to 80°F (21°C to 27°C), and let it rest undisturbed for 24 hours.
- Each day, feed your starter by adding equal parts flour and water (100g each), stirring vigorously until well combined.
- Watch closely as, after several days, your starter begins to bubble and develops a pleasant sour aroma.
- Once your starter doubles in size within 4 to 6 hours after feeding, it’s ready to use.
Notes
Store your sourdough starter in the refrigerator if not using it daily. It can last up to a week without feeding.
Nutrition
- Serving Size: 1 serving
- Calories: 50
- Sugar: 0g
- Sodium: 5mg
- Fat: 0.2g
- Saturated Fat: 0g
- Unsaturated Fat: 0g
- Trans Fat: 0g
- Carbohydrates: 10g
- Fiber: 0.5g
- Protein: 1.5g
- Cholesterol: 0mg